Overblog
Suivre ce blog Administration + Créer mon blog
OBD2 Diagnostic Tools
Articles récents

How to program Chrysler PCM with DRB III Emulator

23 Janvier 2019 , Rédigé par JTAC Publié dans #witech micropod 2

Look here: Procedure in detail will be of interest to those contempating a PCM change

After reading this, it is obvious that PCMs can be reprogrammed.

I have flash DVD for the DRB III, hopefully I will get it and can then do programming on a “swap” system. Keeping my fingers crossed.
It is Chrysler’s new “policy”

Mopar® is currently phasing out pre-programmed PCMs for the vehicles listed. New
modules will no longer be pre-programmed when received from Mopar®. Replacement of
future PCMs will require programming utilizing the DRBIII and TechCONNECT. The PCM
will not operate the engine until it is programmed. A Diagnostic Trouble Code (DTC) will be
set – “not programmed”.

CAUTION: Extreme care must be taken when programming a calibration into a
generic PCM. Do not randomly select a calibration. Once a calibration is
selected and programmed, the controller cannot be reprogrammed to a
different calibration. The module can only be reprogrammed to a more
recent version of that calibration.

When flashing a 2002 – 2004 LH vehicle the BCM may need to be
disconnected if experiencing failures during the flash of the transmission
portion of the PCM. The BCM will need to be disconnected after the module
ID portion of the flash is complete. Before pressing Page Forward to begin
the flash of the PCM Turn the Key to the OFF position and disconnect the
BCM. Then turn the KEY to the RUN position and Press Page Forward to
begin the PCM flash session.

NOTE: If this flash process is interrupted/aborted, the flash should be restarted and
then follow the directions on the DRBIII emulator.

Step 1. Before beginning the reprogramming procedure, remove any old flash reprogramming
files from the DRBIII memory. To clear the memory from the MAIN MENU power up
the DRBIII and then:
a. Simultaneously press the “MORE” and “YES” keys.
b. A screen will appear requesting a “COLD BOOT”.
c. Follow the on screen instructions by selecting the “F4” key.
d. When the DRB III® reboots to the MAIN MENU, proceed to Step 2.
NOTE: If your vehicle is a 2002 LH and the original PCM part number begins with 04
the technician should use the 2002 LH Part Number Reference chart above to
determine the corresponding “NEW” part number. This new number from the
chart should then be entered into the Tech tools application as the orginal
part number. If the original PCM number begins with 05 no change to the
flash selection process is required.

Step 2. With the ignition switch in the “RUN” position, determine the original part number of the
PCM currently in the vehicle. Using the DRBIII select:
a. “DRBIII Standalone”
b. “1998 – 2004 Diagnostics”
c. “All (Except Below)”
d. “Engine”
e. “Module Display”
f. Record the first ten (10) characters of the “PCM part #” on the repair order for later
reference.
NOTE: If the PCM is not operational, the part number can be obtained from the label
on the old controller. If the label on the controller is not legible, proceed to
next step.

Step 3. Page back to the “Main Menu”

Step 4. Determine if the vehicle is equipped with SKIM. Using the DRB3 select:
a. “DRBIII Standalone”
b. “1998 – 2004 Diagnostics”
c. “All”
d. “System Monitor”
e. “J1850 Module Scan”
f. Look for “SKIM” in the list of modules.

Step 5. If the vehicle is not equipped with SKIM then proceed to step 6. If the vehicle is
equipped with SKIM obtain the vehicle Personal Identification Number (PIN) before
continuing with step 6. This information is available from one of the following:
a. The original selling invoice.
b. The DealerCONNECT system under the “Sales” or “Parts” tabs – select “Key
Codes”.
c. By contacting the DaimlerChrysler Customer Assistance Center (DCCAC) at
1-800-992-1997.
CAUTION: Failure to install the SKIM pin number into the module after flashing the
PCM will cause a start and stall condition.

Step 6. Replace the PCM using the appropriate generic control module. Refer to the service
information available in TechCONNECT or the appropriate service manual in Section
8E, Electronic Control Modules, Powertrain Control Module, Removal/Installation.

Step 7. Open the hood, install a battery charger and verify battery state is above 11.5 volts.

Step 8. If the old “PCM part #” is known, proceed to step 14. If the old “PCM part #” is not
known, proceed to next step.

Step 9. On DealerCONNECT select the “Service” tab.

Step 10. Select “Vehicle Information Plus”.

Step 11. Manually enter the VIN and mileage and select “Enter”.

Step 12. Select the “Vehicle Option” tab.

Step 13. Under the “Vehicle Option” window, identify and record:
a. Engine.
b. Emissions (Federal or California).
c. Transmission (Automatic, 5-speed manual, etc.).

Step 14. Connect the DRBIII to TechCONNECT and the vehicle. Open TechTOOLS and
verify that the “DRBIII Status: Connected” message is in the upper right corner of the
TechTOOLS screen.

Step 15. TechTOOLS should automatically populate the VIN in the “Vehicle Criteria” area and
the available updates. If not, manually enter the VIN then TechTOOLS will populate
the available updates.
NOTE: Do NOT enter the generic controller part number in step 16a below.

Step 16. Determine the proper calibration:
a. If the old “PCM part #” is known, enter the part number of the old controller in the
“Parts Criteria” p/n window. Proceed to step 16.
b. If the old “PCM part #” is not known, select the correct calibration based on the
information that was recorded from “Vehicle Options” in step 13.

Step 17. Select the correct calibration.

Step 18. Select the “Download/Update” button.

Step 19. Monitor the “Flash Download/Update Progress” window on the TechCONNECT and
follow the instructions on TechCONNECT/DRBIII. When the flash process is
completed, proceed to next step.

Step 20. Enter the VIN in the PCM. Using the DRBIII select:
a. “DRBIII Standalone”
b. “1998 – 2004 Diagnostics”
c. “All”
d. ”Engine”
e. “Miscellaneous”
f. “Check VIN”
g. If the vehicle is not equipped with SKIM proceed to step 20h. If the vehicle is
equipped with SKIM follow the directions on the DRBIII. When the VIN and SKIM
key has been programmed, proceed to step 20.
h. Enter the VIN as requested by the DRBIII.

Step 21. Update the PCM mileage. Using the DRBIII select:
a. “DRBIII Standalone”
b. “1998 – 2004 Diagnostics”
c. “All (Except Below)”
d. “Engine”
e. “Miscellaneous”
f. “Check PCM Odometer”
g. “NO”
h. Enter the current odometer mileage and then press “Enter”.
-9- 18-006-04 REV. B
i. Cycle the ignition key to the OFF position and back to the ON position and then
press “Enter”.

Step 22. Proceed as follows:
a. If the vehicle is equipped with an automatic transmission, proceed to step 24.
b. If the vehicle is equipped with a non-turbo engine and manual transmission, it is not
necessary to set the pinion factor. Proceed to step 24.
c. If the vehicle is equipped with a Turbo engine and manual transmission, proceed to
step 23.

Step 23. On vehicles equipped with a Turbo engine and manual transmission, set the Pinion
Factor. Using the DRB III select:
a. “DRBIII Standalone”
b. “1998 – 2004 Diagnostics”
c. “All (Except Below)”
d. “Engine”
e. “Miscellaneous”
f. “Pinion Factor”
g. Select the correct tire size and then select “Page Back” to exit.
h. Proceed to step 24.

Step 24. On vehicles equipped with an automatic transmission, set the Pinion Factor. Using the
DRBIII select:
a. “DRBIII Standalone”
b. “1998 – 2004 Diagnostics”
c. “All (Except Below)”
d. “Transmission”
e. “Transmission Module”
f. “Miscellaneous”
g. “Pinion Factor”
h. Select the correct tire size and then select “Page Back” to exit.
i. Enter “Quick Learn” and then follow the instructions on the DRBIII.
NOTE: Due to the PCM programming procedure, a DTC may be set in other modules
(TCM, BCM, MIC, SKIM, etc.) within the vehicle, if so equipped. Some DTC’s
may cause the MIL to illuminate. Check all modules using “Module Scan”,
record the DTC’s, and erase these DTC’s prior to returning the vehicle to the
customer. Erase any DTC’s in the PCM only after all other modules have had
their DTC’s erased.
NOTE: The following step is required by law.

Step 25. Type the necessary information on the “Authorized Modification Label” p/n
04275086AB and attach near the VECI label (Fig. 1).


You have to know: esp. for newbies


You’d better take a VCI Pod for use with DRB iii, NOT the clone Micropod 2 (even the high quality SP271-C1 cannot work good with DRB emulator. ) look here: http://blog.obdii365.com/2019/01/16/drb3-emulator-worked-with-micropod-2-or-vci-pod/ tested on 300M. VCI Pod says yes but Micropod2 clone cannot work….

Lire la suite

DRB III and VCI Pod for Chrysler 300M ABS Bleeding

22 Janvier 2019 , Rédigé par JTAC Publié dans #witech micropod 2

Here’s something good i found when i bled ABD for my 300M. Very useful…. Hope it works for you guys also.
 
Complaints i posted in https://300mclub.org/forums/:
 
I noticed something with my car that I wanted to comment on since “testing” my ABS for the first time this season. After arriving to school just in time for a final I put my foot down hard on the brake while pulling into the gravel lot, which was frozen over just like a skating rink. As I fully anticipated the ABS came on and was effective. However, once I came to a complete stop the pedal went soft and I had to pump it 6 or 7 times before it firmed back up (no jokes please). I have noticed my brake pedal is a little softer than most other LH cars I have driven but I have never noticed variance like this after ABS braking. I am very familiar with braking using ABS in my car and I think this is something abnormal.
 
Tips I got from user97:
Did the fluid level drop — if it did, then you probably got a leak somewhere and air in the system.
 
If the fluid level is OK but pedal is softer after ABS engagement, there is a possibility that a valve in the ABS system did not close fully.
 
In order to provide anti-lock capability, ABS unit has the ability to isolate any wheel from the M/C pressure as well as relieve the pressure into a temporary storage (accumulator). The ABS pump then pumps the excess fluid back into the M/C (hence pedal pulsing).
 
There is a possibility that the valve on one wheel has not completely closed and allows bleeding into the “accumulator”. As ABS system is not engaged, the pump will not start to empty the accumulator. So you are basically compressing the accumulator spring before any significant brake action on that circuit would commence. Accumulator has a rather small volume, so it would reach capacity pretty quickly. I noticed that there is a significant amount of rust that builds up in the brake fluid as the lines rust from inside due to moisture accumulation. May be a flake of rust got stuck in the valve and provides a miniscule leak into accumulator. ABS monitors state of the valves — anything significant would trigger an ABS fault.
 
It might be something else, like M/C leaking internally past pistons. But on the off chance, I would exercise ABS a few more times. Valve action would most likely cure the issue if it is the problem.
 
Search on Youtube and there is some video that illustrates ABS HCU operation
(AFAIK, on our cars ABS controls rear wheels independently rather than as a pair).
 
Playing with DRB III, you discover how potent ABS system is. When running ABS HCU test, it instructs you to apply pressure to the brake (with engine off/booster bled). Then ABS valves open up, filling up accumulators. It is very impressive — pedal falls to the floor without any resistance. As the next stage of the test, it closes the valves and turns on the pump, which literally pumps the pedal back to the original state. While I knew how ABS worked in general terms, I never realized the degree to which ABS could potentially interfere with normal brake system. No wonder, the unit is designed to be so fail safe, as to prevent such failures (turns itself off at the slightest sign of trouble).
 
Normally, there should be no need to bleed ABS, as long as MC was never run dry, you should be OK. I would be careful about sucking fluid out of MC — a little is OK, just make sure that neither half gets empty to prevent air injection.
 
On a side note, for DRB iii, you’d better use VCI Pod, NOT the clone Micropod 2 (even the high quality SP271-C1 cannot work good with DRB emulator. ) look here: http://blog.obdii365.com/2019/01/16/drb3-emulator-worked-with-micropod-2-or-vci-pod/ tested on 300M. VCI Pod says yes but Micropod2 clone cannot work….
witech-v17-review
 
Lire la suite

Will wiTech Micropod2 program a used Dodge ECM?

20 Janvier 2019 , Rédigé par JTAC Publié dans #witech micropod 2

Witech Micropod II new test report from obdii365.com customer. 
 
 Amazing. I received the device in record time. I was nervous if this device will work to program an used ECM that I replaced from another Dodge to my Dodge. Purchased a subscription at Tech Authority, and this device showed that the ECM/TCM had new flash to be upgrade. At the beginning I had an error on my PC that this device did not support my car with the latest version 17.0.4 (something like that). I did uninstall the new software and installed the old 17.0.3 and worked. I did flash and reprogram with no issue at all, and bang the Dodge came alive with no problem. This device works like a charm.
Thank you again.  
Lire la suite

CGDI MB AC Adapter shorten data acquisition time to 10 35minutes

18 Janvier 2019 , Rédigé par JTAC Publié dans #CGDI Prog

Finally CGDI company released the CGDI MB AC Adapter which will shorten the data acquisition time from 2 hours to about 10 minutes – 35minutes without dismantling the EIS.
use-cgdi-ac-adapter-1
 
Supported Benz Models and the data collection time:
S Series W221 EIS 216 acquisition time: 12 minutes
E Series W211 EIS 211 acquisition time: 9 minutes
C Series W209 EIS 209 acquisition time: 9 minutes
B Series W246 EIS 169 acquisition time: 35 minutes
A Series W246 EIS 169 acquisition time: 35 minutes
R Series W251 EIS 164905 acquisition time: 12 minutes
ML Series W164 EIS 164905 acquisition time: 12 minutes
GL Series W166 EIS 164905 acquisition time: 12 minutes
Same function as VVDI MB Power Adapter
Note: CGDI AC Adapter can only work with CGDI MB. VVDI MB Power adapter can only work with VVDI MB as well.
How to connect CGDI AC Adapter with CGDI MB?
use-cgdi-ac-adapter-2


use-cgdi-ac-adapter-3


use-cgdi-ac-adapter-4
 
 
Lire la suite

V2018.12 BMW E/F Scanner BMW-Explorer Software Download

17 Janvier 2019 , Rédigé par JTAC Publié dans #bmw explorer

The latest and most stable software version of BMW E/F Scanner goes to V2018.12.  Here obdii365.com provides software download for free.
 
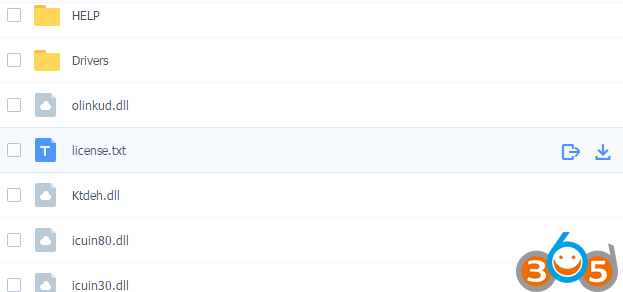
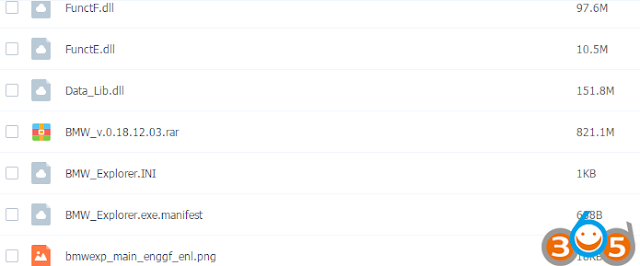
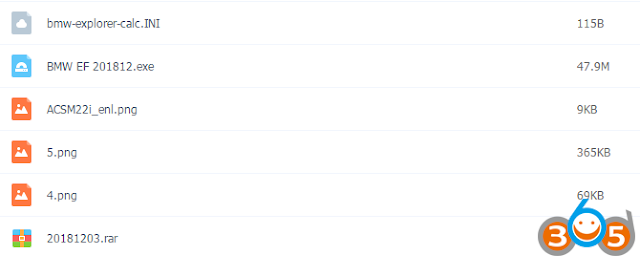
File including
v2018-12-bmw-e-f-scanner-download-1


v2018-12-bmw-e-f-scanner-download-2


v2018-12-bmw-e-f-scanner-download-3
 
Software version: BMW-Explorer V 18.12.03
Added new versions of  SWFL for FEM/BDC and DME/DDE
Fixed programming FEM/BDC/EGS/DME/DDE
Operating system: Windows 7 – Windows 10
Language: Russian /English
Function: Full version supports BMW Diagnosis + IMMO key programming + Mileage Correction + Coding
Full Version Feature:
1.Basic features module
3. E-series Coding module
3.E-series CAS1, CAS2, CAS3, CAS3+  mileage Reset
4.E-series keyprog module
5.FEM/BDC mileage module
6.F-series mileage correction module
7. FLASH calibration READ/WRITE calibrations for F and G series models
8. ISN reset for F-series HP8 gearbox
9. FEM/BDC keyprog module
10. ISN MSx8x (SIEMENS) for BMW
11. F-Coding module
12. Tricore module for BMW
13. CAS4 CAS4+ F-series keyprog module with F-ISN
v2018-12-bmw-e-f-scanner-software-1


v2018-12-bmw-e-f-scanner-software-2


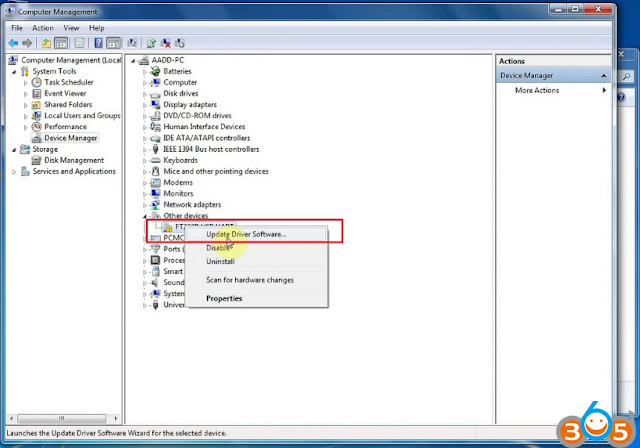
Select the computer, and then right-click, select Manger
Open  Device Manager
Quickly we click two times on USB Serial Port
v2018-12-bmw-e-f-scanner-driver-1
 
We choose the bookmark Driver and we press on Update Driver
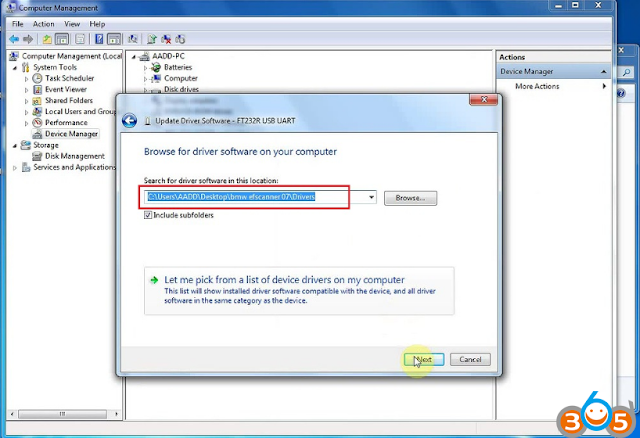
Further we choose Browse my computer for driver software and we press the Browse button
v2018-12-bmw-e-f-scanner-driver-2
 
Further we Choose a directory where there are drivers for the adapter (by default C:\Program Files (x86)\BMW_Explorer\Drivers\FTD2XX)
v2018-12-bmw-e-f-scanner-driver-3


v2018-12-bmw-e-f-scanner-driver-4
 
 
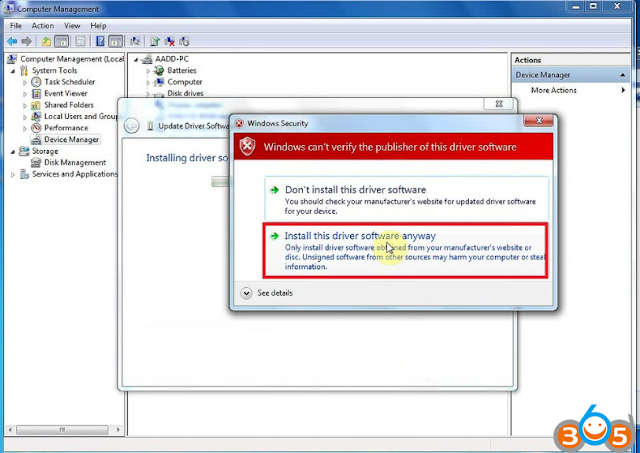
After the choice of drivers we press Next
v2018-12-bmw-e-f-scanner-driver-5
 
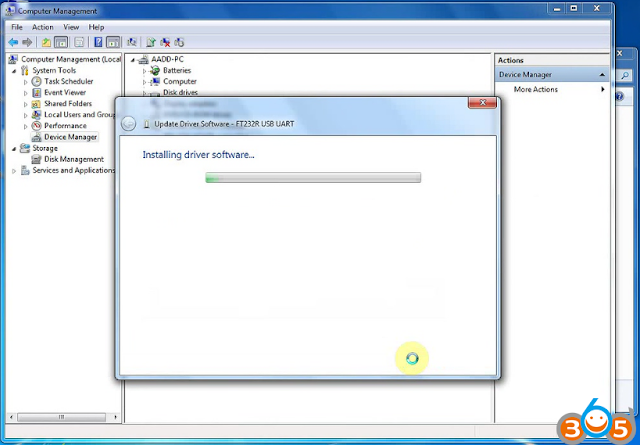
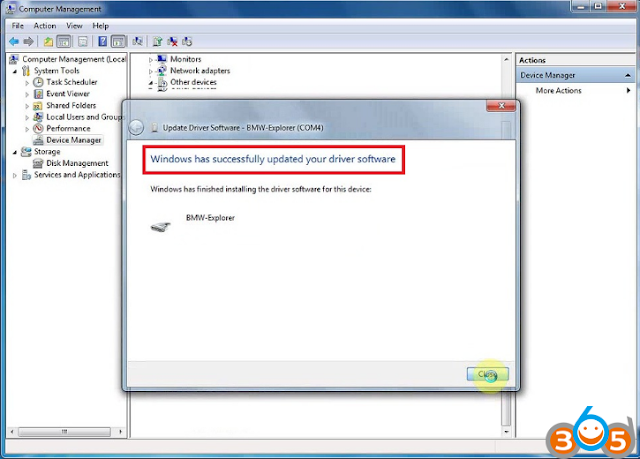
We wait for the end of installation of the driver and we press Close
v2018-12-bmw-e-f-scanner-driver-6
 
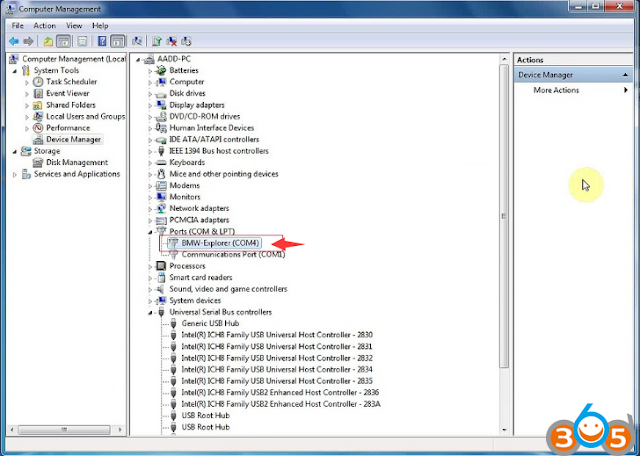
After successful installation we will see the Adapter (USB Serial Port COMXX) in Device Manager
Done.
 
Lire la suite

How to Write BMW CAS3+ Key when all keys lost with BMW E F Scanner

15 Janvier 2019 , Rédigé par JTAC

Here’s the guide to write keys in CAS3+ in case of loss all working keys using BMW E/F scanner and BMW Explorer software.
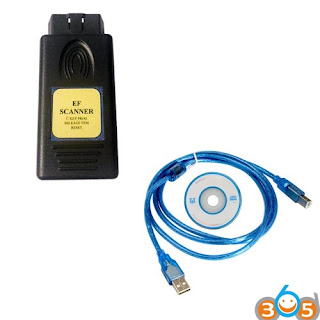
bmw-e-f-scanner
 
ALL keys lost programming procedure
Since ver. 15.02.15 of BMW Explorer user can choose between 3 variants to program ignition key. The lastest version of BMW E/F scanner goes to V2018.12.
(Click to enlarge all images)
1. Variant
NOTE: Please ensure that key slot is unblocked before to program the new key there. 

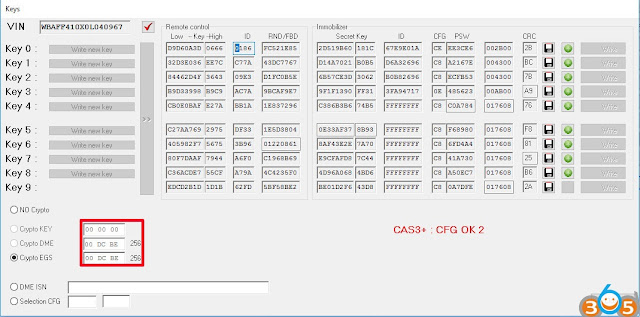
If you have all keys lost, you must answer NO when BMW-Explorer ask if you have working key. BMW-Explorer will then extract crypto from DDE/DME and EGS GS19D (if available). Your PC must be connected to Internet to fulfill this procedure.
Also it will read ISN from the CAS module and automatically fill the CRYPTO fields in the working window of BMW Explorer.

If all the fields are match each other it means that crypto is correct and you can use any field. For example we can choose EGS crypto, then upload *.bek file, press write (red button) and just follow on-screen instructions. Then start a car.

If your car has DME/DDE with ews3 system and you are going to use EGS crypto, you must answer YES after BMW-Explorer asks you about “CFG”. Then simply wait the finish of the programming procedure. Don’t forget to make DME-CAS sync in DME menu (this step is not available for DME/CAS with ews4 )
In case if you see a different values in the DME crypto and EGS crypto fields, you can try to program the key using each field in turn. 

After the key successfully programmed you must check a key status field
002B00- for pcf7936 chip
004B00- for smart key
005B00- for keyless-go key

Note: When you are using this way of key programming, make sure than DME/DDE-CAS-EGS belongs to the SAME car
bmw-e-f-scanner-cas3-all-keys-lost-1
 
2 Variant

Please ensure that key slot is unblocked before to program the new key there. 

This variant is usable for a cars equipped with Bosch and Siemens DME/DDE with ews4 16 bytes long ISN code AND you have a possibility to read out ISN from DME/DDE.
BMW-Explorer can read ISN (SecretKey) from the following DME/DDE types-ME17N45 , MEV17_2 , MED17_2 , MV1722 , MVD1722 , MEV17N46 , MEVD176k , D7xN47xx , D7xN57xx , MSS60
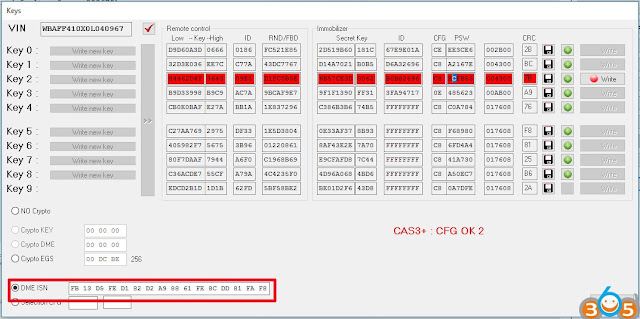
If you got above listed DME/DDE, but BMW-Explorer was unable program key automatically, you must go to DME/DDE (Extra functions), read ISN manually and copy it. After that you must return to the CAS, select Key learning, answer NO when BMW-Explorer ask if you have working key, tick DME ISN box and Paste copied ISN into this field, then upload *.bek file, press write (red button) and just follow on-screen instructions. Then start a car.

After the key successfully programmed you must check a key status field
002B00- for pcf7936 chip
004B00- for smart key
005B00- for keyless-go key
bmw-e-f-scanner-cas3-all-keys-lost-2
 
 
3 Variant
Please ensure that key slot is unblocked before to program the new key there. 

You can TRY to program key by the following way:

1. Read CAS eeprom using any of suitable programmer (Xprog,ETL etc.)
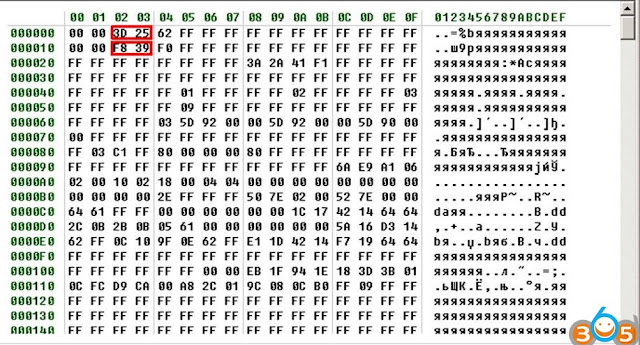
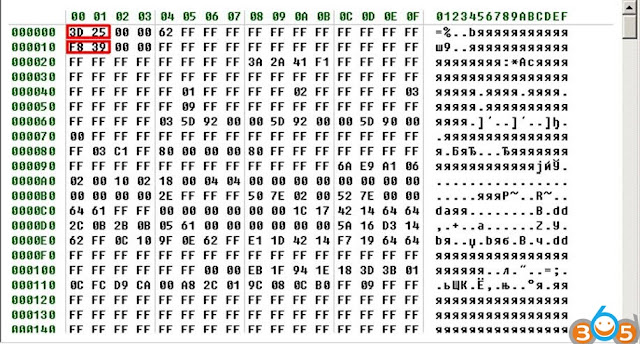
Note: For the CAS modules programmed with ISTA36-42 (bmw numbers 9221719 , 9226238 , 9221720 , 9227053 , 9226238 , 9217853 , 9226239 , 9217854 , 9227053 , 9226239 , 9227106 , 9217854 , 9230590 , 9227053, 9230591 , 9226238 , 9237046 , 9221720 , 9237047 , 9221719 , 9237046 , 9237047), open read eeprom in the HEX Editor and write down values from the 02 and 03 columns in the 1 and 2 rows (as pictured)
bmw-e-f-scanner-cas3-all-keys-lost-3
 
 
2. Note: For the CAS modules programmed with ISTA43-55 (bmw numbers 9253119 , 9253120 , 9257219 , 9253119 , 9257220 , 9253120 , 9262360 , 9262361 , 9267608 , 9267609 , 9273192 , 9262360 , 9273193 , 9262361 , 9278745 , 9267609 ,
9278746 , 9267608 , 9283153 , 9278746 , 9283154 , 9278745 , 9287534 , 9283153 , 9287535 , 9283154 , 9314256 , 9287534 , 9321069 , 9314256) ), open read eeprom in the HEX Editor and write down values from the 00 and 01 columns in the 1 and 2 rows (as pictured)
bmw-e-f-scanner-cas3-all-keys-lost-4
 
 
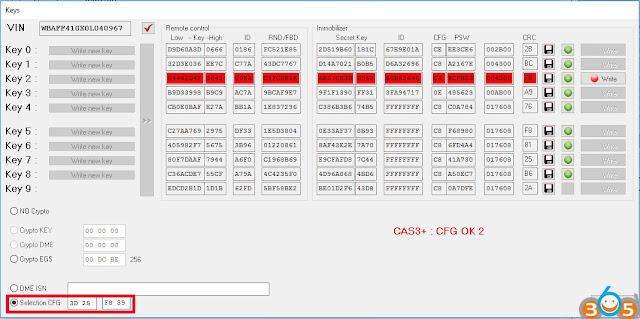
Install CAS3+ back to the car, go to CAS, Extra functions, Key learning, answer NO when BMW-Explorer ask if you have working key,
wait for key data, tick Selection CFG box, enter upper 2 bytes from HEX Editor into first field, enter the lower 2 bytes from HEX Editor into second field.
bmw-e-f-scanner-cas3-all-keys-lost-5
 
Then upload *.bek file, press write (red button), after some time BMW Explorer will ask you to insert a key into the key slot. Enter a key and press OK. After some time BMW-Explorer will ask you about “CFG”, press YES and wait the procedure finish. Key programming can take up to 2,5 hours, therefore BATTERY CHARGER MUST BE CONNECTED TO THE CAR!!!
Note: When you are using this way of key programming, make sure than DME/DDE-CAS-EGS belongs to the SAME car

After the key successfully programmed you must check a key status field
002B00- for pcf7936 chip
004B00- for smart key
005B00- for keyless-go key
Completed.
http://www.key-programmer.org/2019/01/16/program-bmw-cas3-all-keys-lost-with-bmw-e-f-scanner/
Lire la suite

How to install Fgtech 0475 EU Version Step by Step

14 Janvier 2019 , Rédigé par JTAC Publié dans #fgtech

2019 new China clone  Fgtech galletto firmware 0475 software V54 step-by-step installation on Windows 7.

Free download Fgtech 0475 software 
 

Firmware Version:0475; Software version: V54 2012/02
Operating System:  Windows XP, Windows 7 32-bit
 
Multi-Language: English, Spanish, French, Italian, German, Czech, Portuguese, Turkish
 
Unlock version, can use directly, no need to activate.
Support Online Operation.


Procedure:


Step 1: Install setup 
Open Fgtech v54 Software CD

install-fgtech-0475-software-1


Read "Read ME" text file first

install-fgtech-0475-software-2


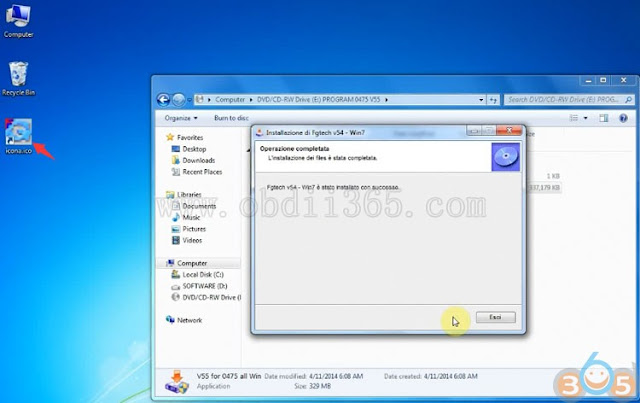
Open and install v55 for 0475 all win.exe

install-fgtech-0475-software-3


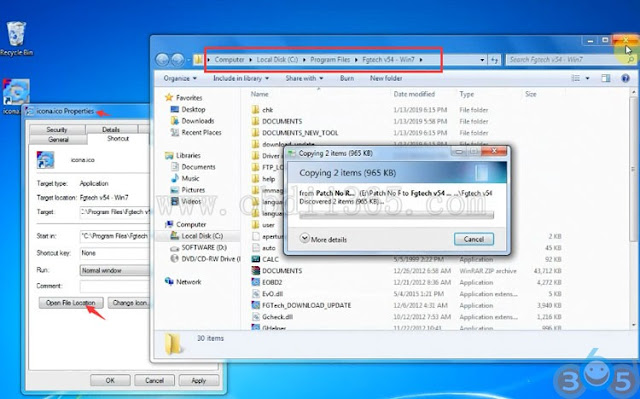
Operation completed will generate icona.ico file on desktop
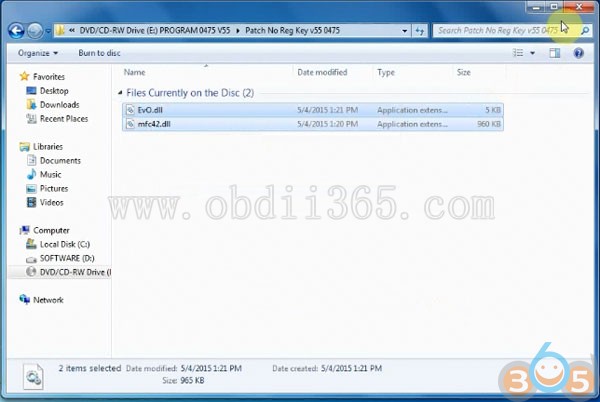
Open Patch No Reg Key v55 folder

install-fgtech-0475-software-4


install-fgtech-0475-software-5


Copy EvO.dll and mfc42.dll files to folder C://Program Files/Fgtech v54- Win7

Step 2: Install Fgtech 0475 driver
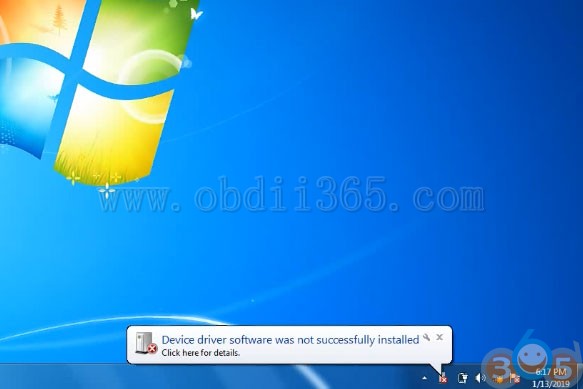
Windows 7 will auto detect device driver

install-fgtech-0475-software-6


If displays driver not successfully install error message, do following:

install-fgtech-0475-software-7


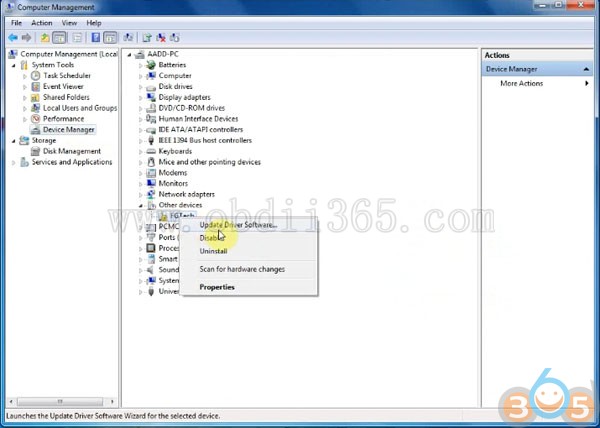
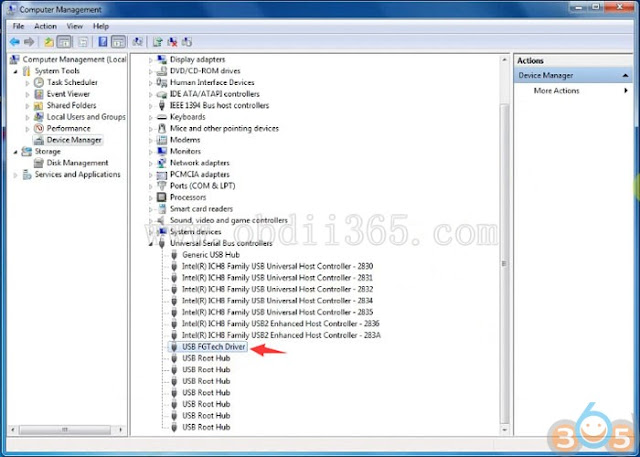
Go to Device Manager->right click on FGTech-> Update Driver Software

install-fgtech-0475-software-8


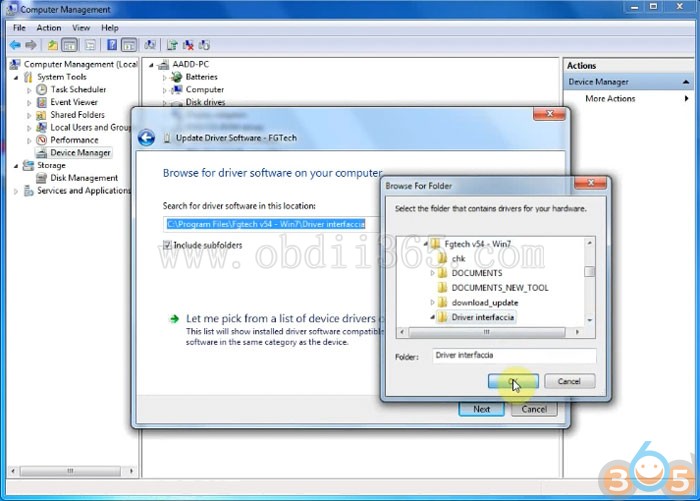
Select Browse my computer for driver software

install-fgtech-0475-software-9


Search for driver in this location:  C://Program Files/Fgtech v54- Win7/Driver interfaccia
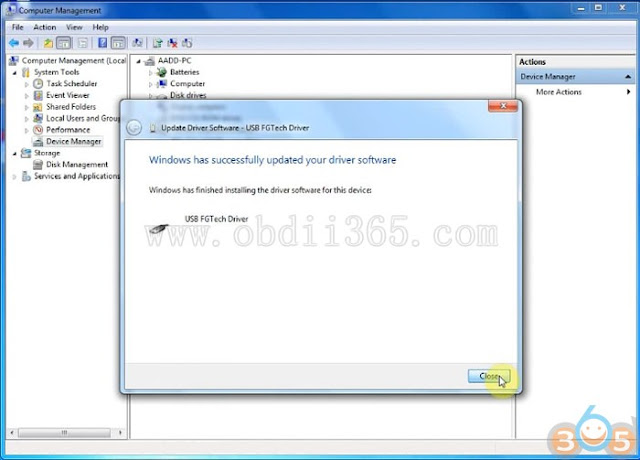
Windows has finished updating and installing the driver sofwtare for fgtech fw0475.

install-fgtech-0475-software-10


install-fgtech-0475-software-11


Software is ready for use.

Step 3: Run fgtech software
Open icona.ico software on desktop

install-fgtech-0475-software-12


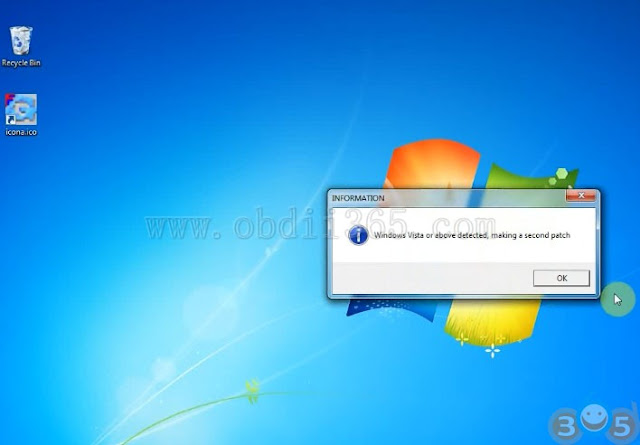
If fgtech prompts Windows Vista or above detected, making a second patch, press OK to contine.

install-fgtech-0475-software-13


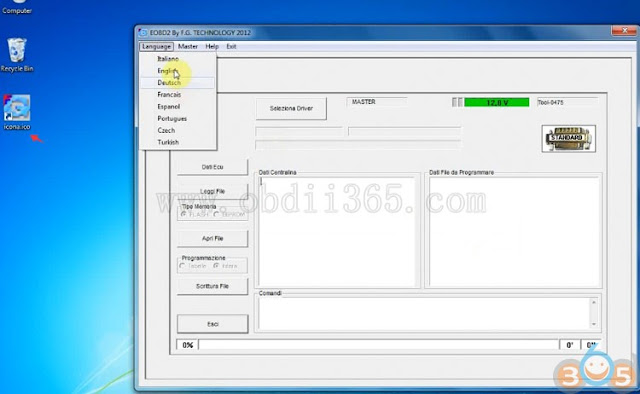
Select language you desired

install-fgtech-0475-software-14


install-fgtech-0475-software-15


Read and write ECU.


Related post:

EU Fgtech Galletto V54 FW0475 Download, Install, Car List, FAQs and Reviews

Lire la suite

How to code BMW X1 F48 with Vgate iCar 2

9 Janvier 2019 , Rédigé par JTAC Publié dans #vgate icar 2

Here I have something want to share with you guys, about BMW hidden features esp. X1 F48 coding at the lowest price. 20 usd (a vgate icar 2 adapter) helps me with all coding.
Enabling hidden features at the consumer level is mainly meant to improve Comfort / Convenience and maybe, to activate a few other cool stuff. It is important that the engine / drivetrain parameters are left untouched unless one is trained to do so. It is prudence to limit Coding only to activate the important features that make our life easy on the day to day basis and not to keep meddling with it on a regular basis. As we are just changing the status of the stock features, the changes made are only over-written in the registry. Coding as we do with the BimmerCode does not add lines to the programme and therefore, the checksum or the coding registration should not change. This is similar to selecting options from the iDrive Infotainment system, except that they are not directly accessible.
Hardware remains the same without any changes; it is only that their default status change and that anyway can be altered by the user ON-THE-GO. There is no way this can have any adverse effect on the car as a whole and therefore, denying warranty is not justifiable. However, preserving a copy of the stock setup file can prove invaluable at times.
 
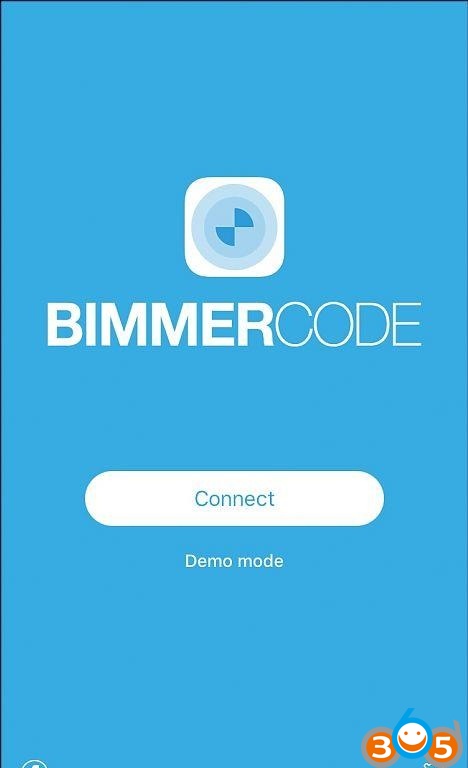
BimmerCode:
The App allows coding of BMW cars and has 2 stages; the first being the simple / straight forward one, which covers the most common features, that too in English. This is sufficient for most purpose. The second being an advanced one, needs in-depth knowledge and unfortunately is in German language; therefore, best avoided unless one can understand German language and knows exactly what he /she is up to. The app saves a copy of the log file every time it scans. This can be exported to an iMac through iTunes for later use.
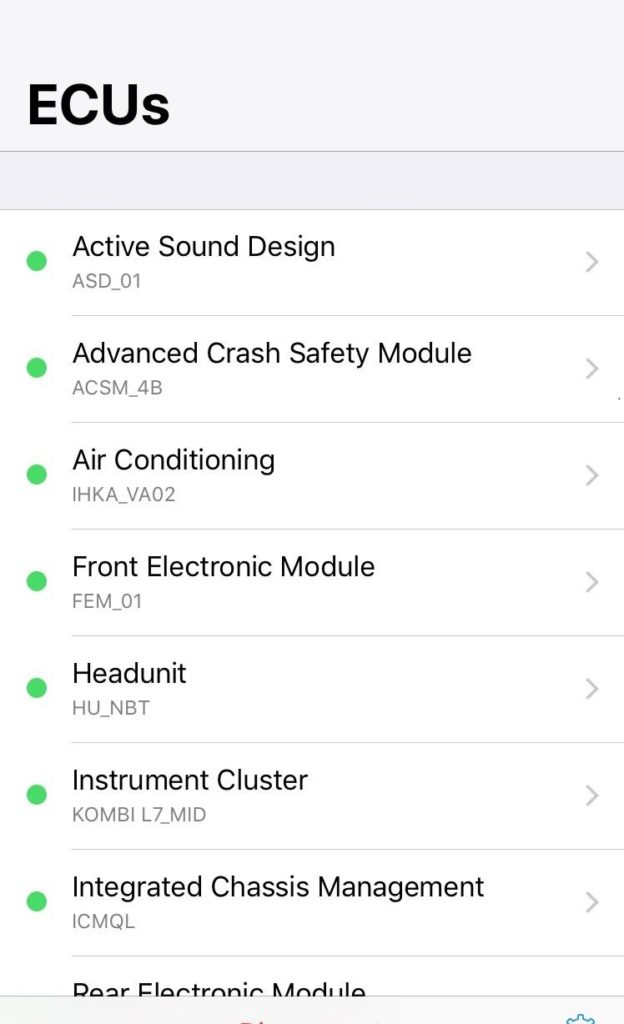
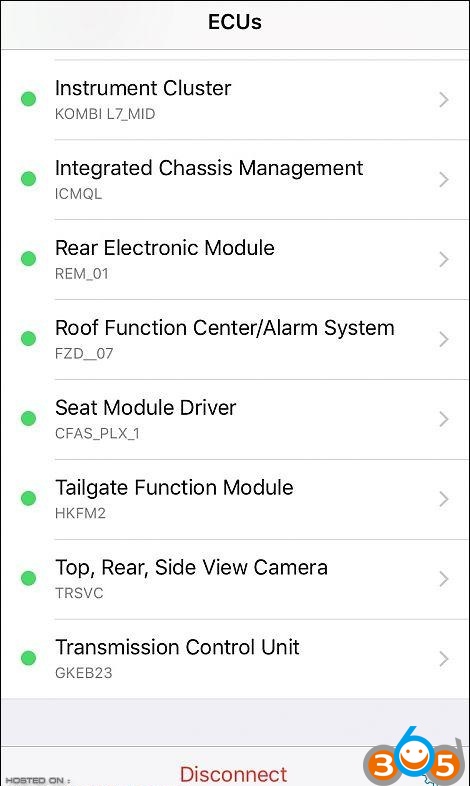
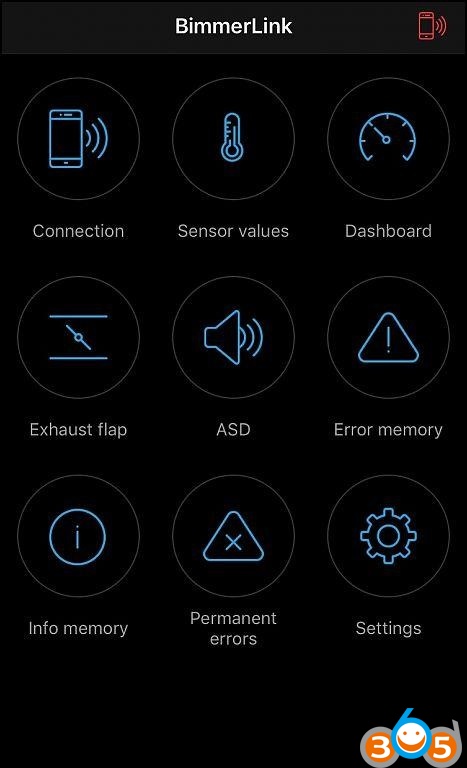
It is a good practice to check error logs through BimmerLink before attempting any changes. This can serve as a reference for future too. It is important to keep the slate clean after every session and therefore, investing on both BimmerCode and BimmerLink makes sense; BimmerCode is used to make changes to the default status of the features and BimmerLink is used to check / clear errors if any.
It is good to turn-on Airplane mode and enable only Wi-Fi connection before starting the activity. This will avoid any calls / messages interrupting the activity itself which can stall communication.
It is recommended to keep the Engine off with the ignition turned-on during the activity. As the modules are reset after applying the changes to the registry, the engine will be turned off. This can create a tense situation un-necessarily.
As the modules are reset during the process, there can be communication drop between modules which can throw-up errors. These errors are automatically erased during the end stages of coding. However, after the coding activity, it is good to manually check for errors through BimmerLink and erase them if needed.
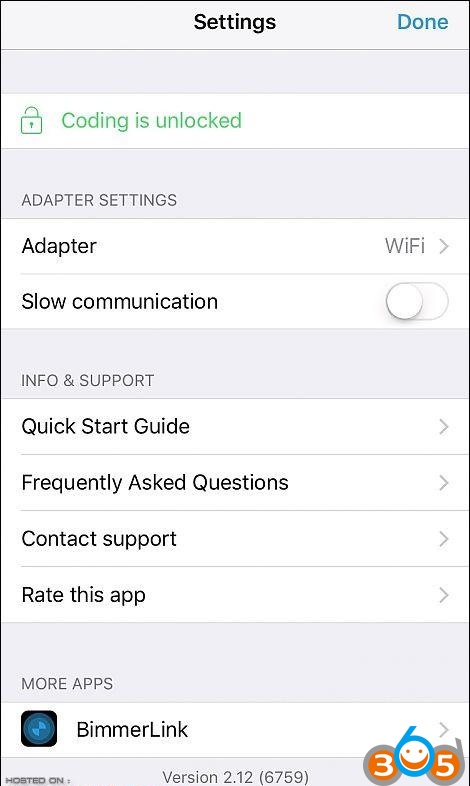
It is best to code features pertaining to one module at a time and verify the results before attempting another module. Some modules which are a combination of analog and digital components will be slower in communication. Therefore, for modules such as Infotainment system, Speedo-Combo, etc. slow communication needs to be selected under settings.
App can be downloaded for free and verified in the Demo mode before purchasing / unlocking the same for coding. Quick start guide and FAQ including the list of supported cars and the options available are all available within the app too.
Make sure that the Mobile battery is fully charged and plan ahead to complete the coding activity within 15-20 minutes so that the car battery does not drain. It is a good practice to keep all accessories switched off during the activity.
vgate-icar2-bmw-coding-1


vgate-icar2-bmw-coding-2


vgate-icar2-bmw-coding-3


vgate-icar2-bmw-coding-4


BimmerLink:
A must have for reading and clearing errors. I would not recommend coding without having this app, as it is very important to clear errors if any, after the activity. This will also help as a future reference. The app also has features to display sensor values, control exhaust flap, along with the provision to have required parameters to be displayed as a dashboard. I am yet to check these features as everything is in German; will update as and when I figure out something!
vgate-icar2-bmw-coding-5
 
 
Vgate iCar2 Wifi OBD2 adapter:
It was available with me came in handy. I downloaded both BimmerCode and BimmerLink apps from Apple Store for approximately Rs.2100 each. Wi-Fi dongle worked fine with communication speed similar to that I have experienced with the VCDS.
Vgate iCar2 Wifi OBD2 adapter:
BimmerCode & BimmerLink:
But honestly, I miss VCDS; wish Ross-Tech had their product covered for BMW too.
 
Features that I could successfully code:
1. Auto Start/Stop system OFF by default
2. Auto fold/unfold ORVM with lock/unlock
Indian variant X1 F48 does not have the hardware pertaining to the front passenger seat belt reminder!! Therefore this non-existing feature can-not be activated!! Crap!!
Of-late, BMW has hard-coded lane change indicator cycle selector. Therefore this can-not be accessed for coding. Choice through Infotainment system is only between 1 and 3 cycles.
Auto Handbrake activation is not possible through BimmerCode. Have to try my luck elsewhere. I read somewhere on the net that this is possible through E-Sys.
I will be glad to support fellow BHPians in Bangalore to activate these features if they need / interested. It will be nice if someone has Carly or the E-Sys in Bangalore, so that they can be compared. Maybe, they can activate a couple of things that the BimmerCode couldn’t.
Thanks for reading!
Lire la suite

Renault Sirius 32 Renault K-line read and write with Fgtech 0475

6 Janvier 2019 , Rédigé par JTAC Publié dans #fgtech

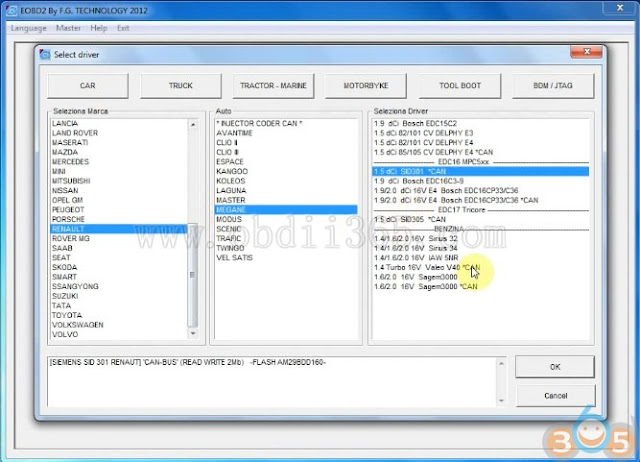
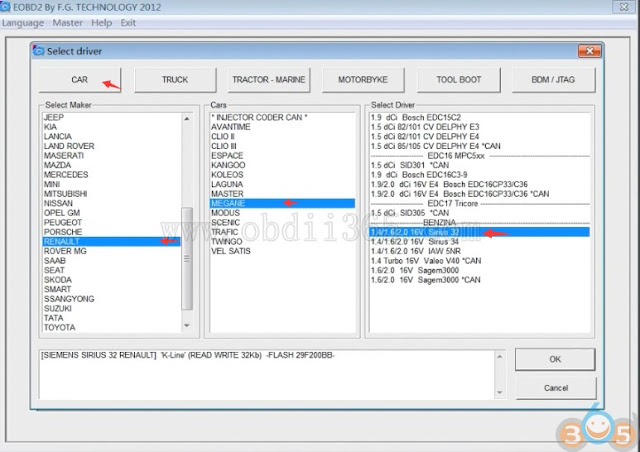
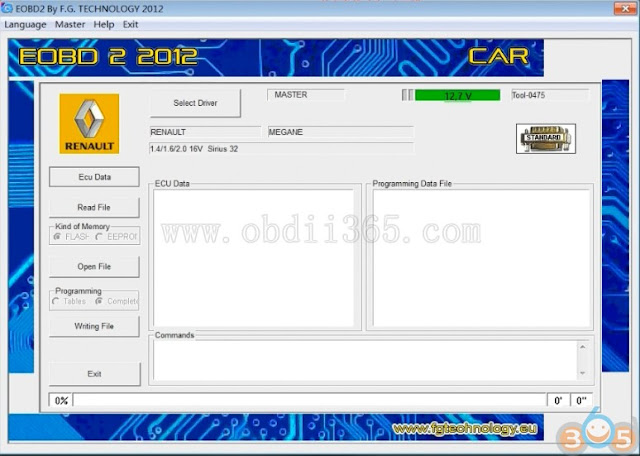
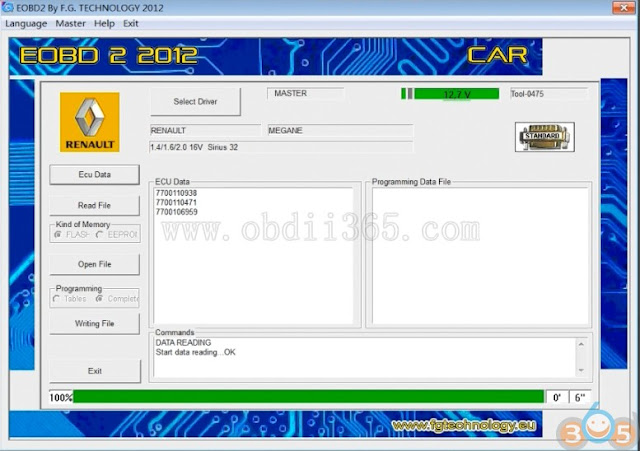
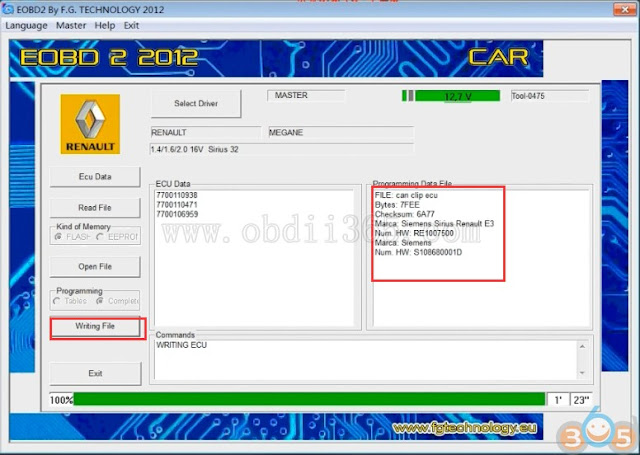
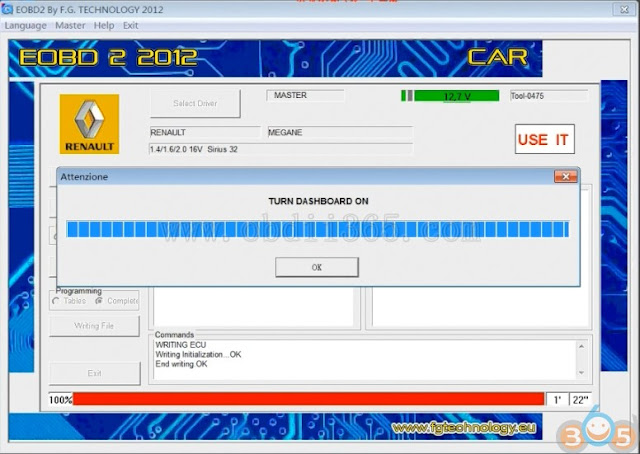
Fgtech galletto v54 new fw0475 master clone has been tested to read and write Renault Megane Siemens Sirius 32 ecu without issue.


Set up Fgtech v54 software

fgtech-0475-read-write-renault-sirius-1


Select  Car->Renault->Megane ->1.4/1.6/2.0 16V Sirius  32
Siemens Sirius 32 Renault K-line read and write

fgtech-0475-read-write-renault-sirius-2
fgtech-0475-read-write-renault-sirius-3


fgtech-0475-read-write-renault-sirius-4


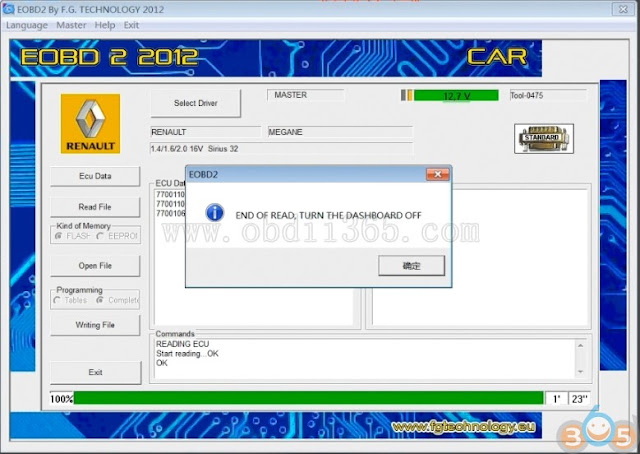
Read ECU data

fgtech-0475-read-write-renault-sirius-5


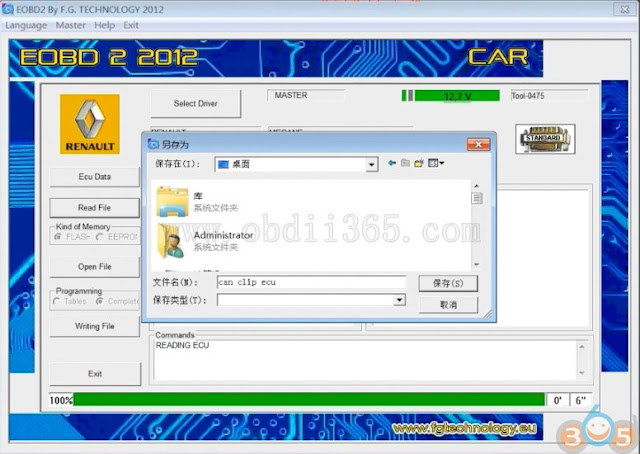
Save ECU data

fgtech-0475-read-write-renault-sirius-6


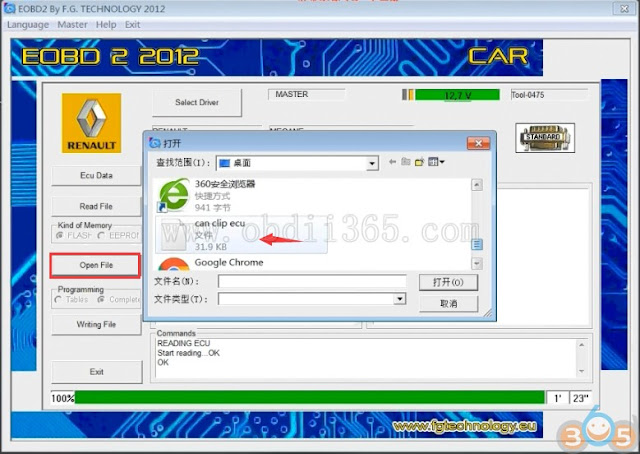
Open ECU data just saved

fgtech-0475-read-write-renault-sirius-7


Writing ECU

fgtech-0475-read-write-renault-sirius-8


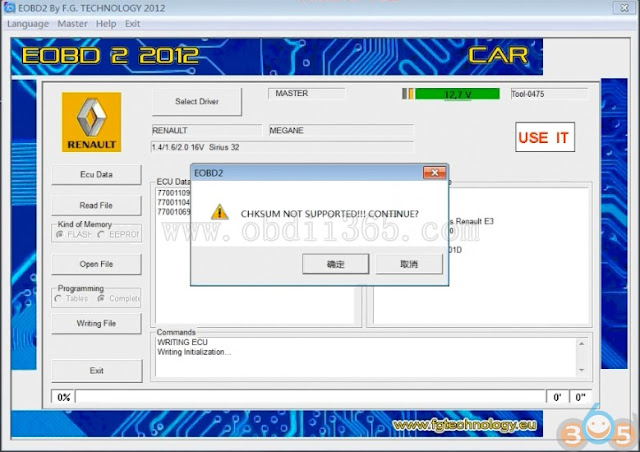
If fgtech 0475 prompts Checksum not supported, press YES to continue

fgtech-0475-read-write-renault-sirius-9


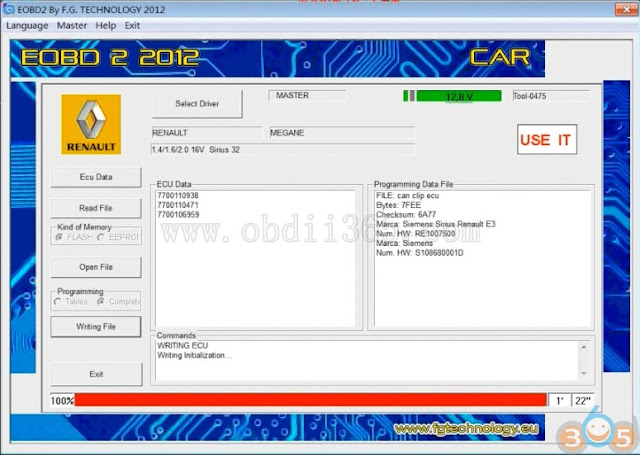
Writing ecu in progress

fgtech-0475-read-write-renault-sirius-10


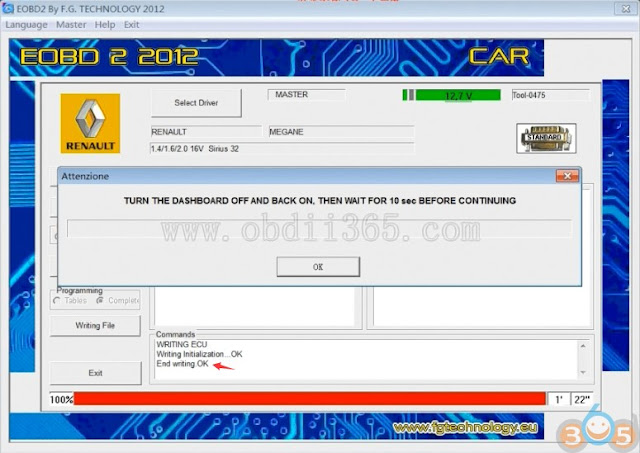
Turn the dashboard off and back on. Then wait for
10 sec before continuing

fgtech-0475-read-write-renault-sirius-11


Fgtech V54 write Renault Sirius 32 ECU success

http://www.obdii365.com/producttags/fgtech-galletto.html

Lire la suite

Foxwell NT510 vs. Creator C310+ BMW Code Scanner

3 Janvier 2019 , Rédigé par JTAC Publié dans #creator c310

What makes Foxwell NT510/NT520 Pro perfect for BMW diagnosis? Check the table comparison below:


Top 2 BMW plug-and-play code scan tool Foxwell NT510/NT510 vs. Creator C310+
 
Image
 
nt510-foxwell
 
creator-c310
Item
Customer Rating
4.1 / 5
4.4 / 5
BMW OBD2
Yes, (OBDI with extra adapter)
CEL
Yes
N/A
Transmission
Yes
No
ABS, SRS
Yes
Yes
I/M Readiness
No
No
Oil Reset
Yes
Yes
EPB
Yes
N/A
DPF
Yes
N/A
Coding (on specific vehicles)
Yes
N/A
Price (in obdii365.com)


Note: There are clone C310 multi-system scanner on the aftermarket.  The genuine C310+ is from Creator company with latest version software (current version V8.0)
 
Both code scanner with free lifetime software updates. 
 
In conclusion: 
 
Both scanners are ideal for DIY enthusiasts and beginner professionals who frequently work on BMWs. If you do small-scale independent repairs or run a small garage it will serve you effectively. The functionality supports both basic and advanced functionality, which is perfect for semi-professional use.
Lire la suite

Which tool to virgin Benz W211 E280 TCU, VVDI MB, FVDI or AVDI

2 Janvier 2019 , Rédigé par JTAC Publié dans #VVDI MB, #FVDI

Here are possible solutions of how to do if you have lost old data of 7G Mercedes-Benz e280 w211.
vvdi-mb-virgin-w211-ecu-1
 
Here you go…
 
1. FVDI: Yes!
You can do by fvdi and data cloud from abrites or you download from some foro
 
2. FVDI and AVDI: Yes!
Only fvdi or avdi dear sorry no need internet if you have base data from abritus or fvdi fly now company name is STIC
 
 3. AVDI: 5 min done!
With AVDI clone can do it, 5 minutes job. Download database from internet, renew unit, after u need XENTRY/DAS to SCN.
 
 4. VVDI MB and Xentry: done!
1) renew with vvdi mb
2) online scn coding with xentry
 
5. VVDI MB and AVDI: Yes!
Vvdi mb tool and avdi can virginize this tcu, so, vvdi mb can perform scn coding but YOU NEED OLD DATA, same thing for AVDI. but if you know the manual coding u can perform by AVDI cloud ( online) otherwise the easy way is Das. Scn online and job done.
 
6. VVDI MB Tool: Tested successfully!
vvdi-mb-virgin-w211-ecu-2


vvdi-mb-virgin-w211-ecu-3


vvdi-mb-virgin-w211-ecu-4
  
Done!!!
http://blog.obdii365.com/2019/01/02/w211-e280-lost-data-done-with-vvdi-mb-fvdi-or-avdi/
Lire la suite

Positive Feedback on GM tech2 off obdii365

1 Janvier 2019 , Rédigé par JTAC Publié dans #gm tech 2, #gm tech2

This was my order of GM Tech2 scan tool with TIS2000 software:
 
Order Date: Aug 26, 2018
 
Ship to: United States
 
This is how GM Tech 2 looks out of the box:
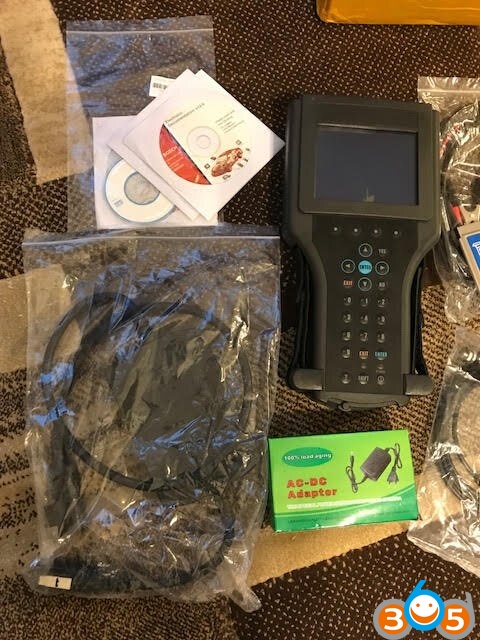
gm-tech2-review-1
 
Turned on:
gm-tech2-review-2
 
The following 3 paragraphs are what I mail to obdii365.com:
I tested device and it works well. Problem is the screen. I believe for return I would have to send back and pay for shipping. This would take a long time and I have work to do using the tool.
Right now I am using a laptop connected so I can see the full screen
gm-tech2-review-3
 
 
I would rather do partial refund or try replacing the screen myself.
Will you do a partial refund?
Can you send or help me find a replacement screen?
I have been happy so far with obdii365.com so far. The price, service and shipping speed was good.
I hope we can reach a positive solution.
 
Finally, obdii365.com ship me a new package.
 
Just want to let you know, I finally took the time to really test out the replacement I was sent and it appears to work perfectly.
 
One small issue is that I was sent a GM PC Card and not a Saab one. I tried to write the GM Card in my laptop to Saab software but I ended up damaging the card. It was my fault. I know that I could have contacted you for help and you would have taken care of me.
 
I was able to find another Saab Card and get it working so I am very happy now. I do not need any more help.


gm-tech2-review-4


gm-tech2-review-5


gm-tech2-review-6


http://blog.obdii365.com/2018/12/31/gm-tech2-review-reached-a-positive-solution-from-obdii365/
Lire la suite

What is the difference between BMW ISTA-D and ISIS?

27 Décembre 2018 , Rédigé par JTAC Publié dans #ista-d, #BMW ICOM Next

This is good information for those who want to know if ISTA-D provides technical diagrams and instructions like ISIS/ICOM.
 
ISIS is a BMW server platform for dealers. All updates are downloaded to the ISIS.
From there the ISIS updates ISID (diagnostics) tablets and ISSS (programming) if applicable.
The ISID runs an embedded windows xp OS.
Installed on the ISID is a program called ISTA-D (recent versions are codenamed ‘Rheingold’)
ISTA-D you can do all diagnostic functions, battery registrations etc etc. it also has wiring diagrams and guides on changing parts.
Some clever russians keep leaking the ISTA-D installer and it can easily be installed on any windows operating system. I can give you download links. They are around 10gb.
In ISTA-D you have a connection manager or how you wish to connect the computer to the odb port.
The common ones are:
ICOM
EDIABAS
OMITEC USB
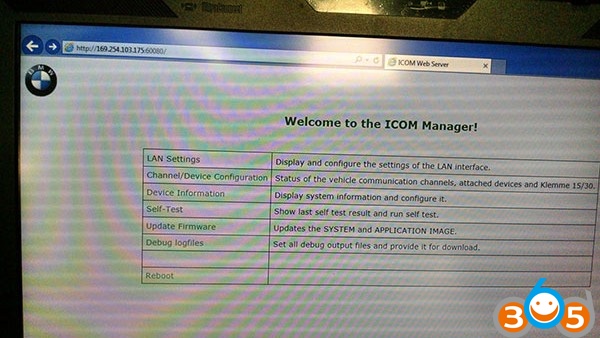
ICOM is BMW official cable, its predocessor was an OPPS unit. An ICOM is more than just a cable however, it has its own network adapter, mac address, cpu, cooling etc etc. Originals are expensive but you can get cheap but hq chinese clones for around $350 USD like this: http://www.obdii365.com/wholesale/bmw-icom-next-a-b-c-with-software.html
bmw-icom-next-review-1


bmw-icom-next-wlan-setup-2


bmw-icom-next-wlan-setup-3
  
EDIABAS is a communication protocal which requires you to have BMW Standard Tools installed aswell – which isnt a bad thing! This utilises comport access amongst other connection methods and is configured by an ini file. Most people use this method of connection as its cheap, you can get a K+DCAN cable for under $50 USD now. Just do your research first as there ar bad clones about!
OMITEC is also an original USB interface. These are very rare. K+DCAN cable are copies of the OMITEC cable.
Update: Thinking it can be used on a Mac also… I use a Mac sometimes no problem with a windows VMware XP virtual machine and ISTA-D installed.
As I said there is no better diagnostic software. Its dealer level software and It’s freely available now all over the Internet. Plus it’s very user friendly!
So price is Cable + Windows XP CD key for the virtual machine…
Hope that helps.
 
Lire la suite

Lonsdor K518ISE Free Subscribed Menus Update Policy

25 Décembre 2018 , Rédigé par JTAC Publié dans #Lonsdor K518

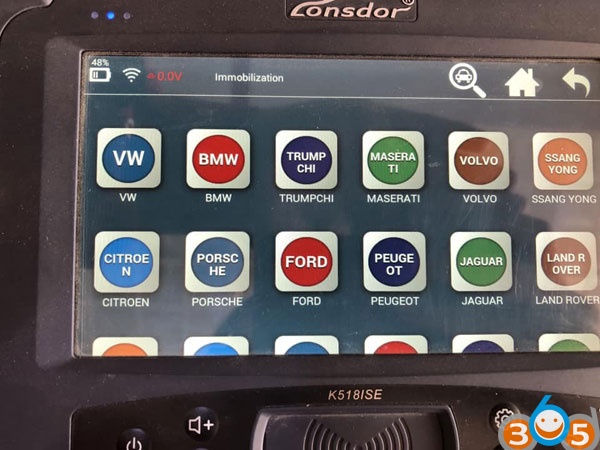
Lonsdor K518ISE Menus are divided into two parts: free menus and subscribed menus.
1.Free menus are free for lifetime.
2. Subscribed menus can be used for free for 90 days. You need to pay for them after the trial period. After the trial period, subscribed menus will not work properly if you don’t pay. And the menus will disappear after updating the device.
A. 365 days is a period and the price is USD600 per period. One year period starts from the day of the trial period finished.
B. Purchase subscription from us. You can use the menus normally and permanently after payment.
C. Menus which you purchase includes subscribed menus that have been released and that will have been released in one year period.
D. Subscribed menus beyond one year period requires extra payment.
lonsdor-k518-new-menu-1


lonsdor-k518-new-menu-2
 
Lire la suite

How to Add Ford Fusion 2017 Smart Key with Lonsdor K518

20 Décembre 2018 , Rédigé par JTAC Publié dans #Lonsdor K518

Ford Fusion 2017 smart key successfully programmed by Lonsdor K518ISE key programmer under New Mondeo menu. 
lonsdor-k518-2017-ford-fusion-1
 
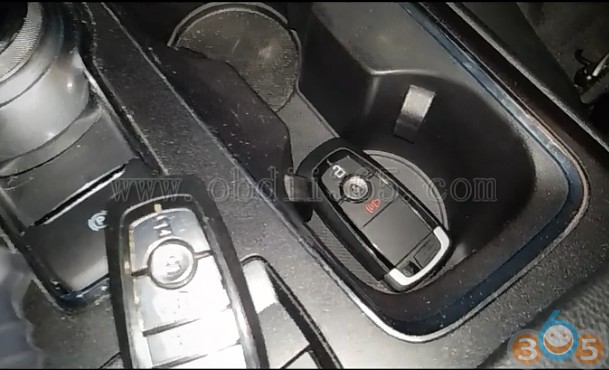
Original key (Put original key into cup holder)
lonsdor-k518-2017-ford-fusion-2
 
New smart key 315MHz
 
 
Connect K518 with vehicle via OBD socket
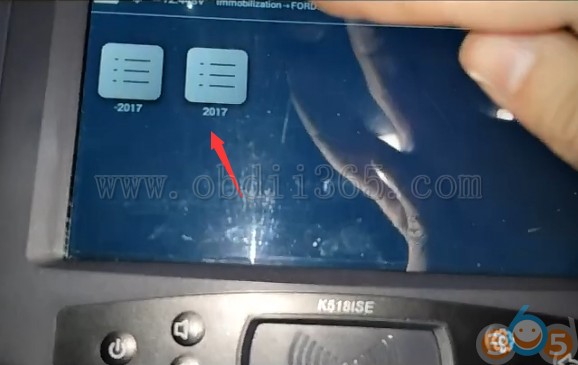
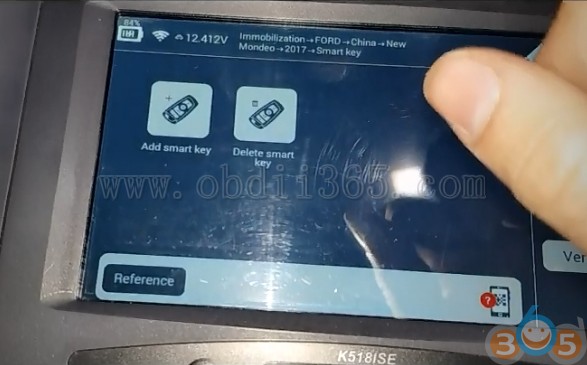
Select Immobilizer->Ford->China->New Mondeo->2017->Smart Key->Add smart key
lonsdor-k518-2017-ford-fusion-3


lonsdor-k518-2017-ford-fusion-4


lonsdor-k518-2017-ford-fusion-5


Turn ignition switch to ON position
lonsdor-k518-2017-ford-fusion-6
 
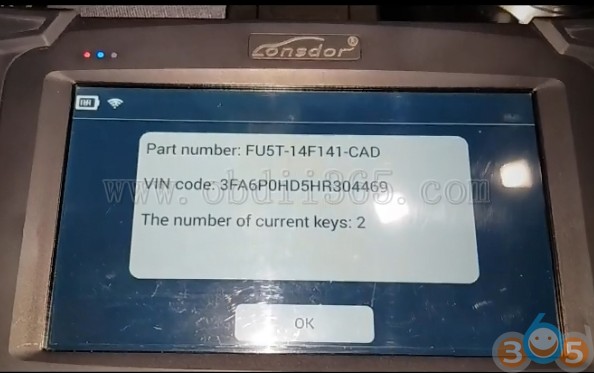
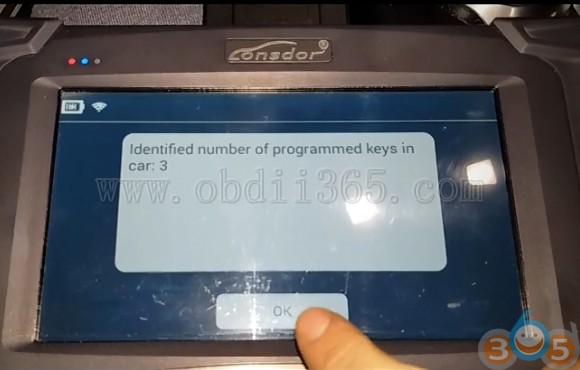
Lonsdor K518 reads vehicle info. VIN, key number
Put a new smart key into slot (cup holder) and press Start button
lonsdor-k518-2017-ford-fusion-7


lonsdor-k518-2017-ford-fusion-8
 
 
Programming in progress
lonsdor-k518-2017-ford-fusion-9
 
Identify new key programmed
lonsdor-k518-2017-ford-fusion-10
 
Program completed.
Test the new key.
 
 
Lire la suite