

/image%2F1896381%2F20151209%2Fob_cb2b49_obd365-com.png)


I need to program a psg16 pump vp44 (the Opel Vectra 2.2 dti car got several electrical errors due to a PSG16 change). I see that gm tech2 scanner can do it. If I buy a new PCMCIA card, can I get it working? the MDI/MDI2 can I also program?
Articles récents
Solved! MB Star Xentry Working DAS Not Hardware Change
A Mercedes Benz Xentry DAS software user feedback: Xentry works, Das problem and this is the wrong with the DAS software “This software does not accept more hardware changes…”


And this is my Xentry DAS software version:

Obdii365.com Technical Support:
Please send teamviewer to see it remotely
And when he helped me fix the problem by team viewer, I took a screenshot two images showing they are very skilled with this problem troubleshooting.


In 2 minutes, the seller’s engineer replied:
das software problem has been resolved.
You have 12/2018 Xentry software, and the DAS software is not activated, I helped you activate DAS and it will work.
And you can read the guide on how to activate 12/2018 DAS software:
http://blog.obdii365.com/2018/11/27/activate-2018-12-mb-sd-connect-c4-xentry-openshell/

Big thanks to them for quickly help me solve the problem.
For your information, suggest you own the newest version 03/2021 Mercedes Benz Xentry DASsoftware for sd connect c4.
Publicité
Swap GM Opel PSG16 by Tech2 via SPS Programming
Question:
Answer:
You can flash/swap PSG16 pump via SPS original software.
If you want to program PSG16 you can easily do it with tech2 and TIS2000, GlobalTis v32 or Tis2web. You can buy any card because you can overwrite the software that you need from TIS.
You also can use GM MDI or GM MDI2 or AVDI or any good/approved J2534 tool can be used to do SPS Programming in PSG16.
You download sps on PCMCIA card then cut from card read.
You download sps on PCMCIA card then cut from card read.

EDC 15 / PSG 16 Reprogramming by Tech2 via SPS
Follow the description below carefully to ensure success.
1. Connect TECH2 scan tool to the data link connector.
2. Start TECH2 and select F5: Service Programming System (SPS).
3. Select F0: Request Information.
4. Then select: model year, vehicle type, group, system
5. Follow the instructions in TECH2.
6. Disconnect TECH2 from the vehicle and connect it to the COM port of the computer (flat cable). TIS2000 must be installed on the computer.
7. Check that the software of the computer is newer than that of EDC 15/PSG 16. If so, download it to TECH2.
8. Disconnect TECH2 from the computer and reconnect it to the vehicle.
9. Start TECH2 and select F5: Service Programming System (SPS).
10. Select F1: Program control module.
11. Follow the instructions in TECH2.
12. Wait until programming is complete. This takes approx. 7 minutes.
13. Once programming is complete: switch off the ignition.
14. Test start the engine.
15. Read and clear any DTCs in the control unit. A DTC will be generated because the pump control unit loses communication with EDC 15/PSG 16 during programming.
16. Final check:
Clear DTCs in all systems.
Execute one operating cycle (run the vehicle at varying engine load and speed for five minutes).
Evaluate the operating cycle (check that DTCs were not regenerated).
Launch X431 V How to Print Health Reports?
First comes with Launch X431 V /X431 V+/X431 PRO/ PRO3/ PAD2 Wireless Printer Setup
procedure . Then how to print Health Reports wirelessly from Launch x431 V scan tool.
Part 1: Launch X431 V /X431 PRO/ PRO3/ PAD2 Wireless Printer Setup
Firstly, you have to set up a printer plugin for the first time you use it, it should prompt you to install the correct one, be sure that you’ve selected correct printer and click the print icon.
Step 1. Android devices do not have “drivers” built into the tablet, so you haveto download your wireless printers’ specific app from either “google play store” or the printer manufacturer’s website.

Step 2. Install the wireless printer app onto the X431 tablet and follow the on screen instructions.

Step 3. Configure the app you installed on the tablet to your wireless printer

Step 4. You can now “share” any images, screenshots and X431 diagnostic reports via the app to your own wireless printer.
- To access this menu press the “share” icon and then select your printer app.

Part 2. How to print Health Reports wirelessly from Launch x431 V scan tool
You can see, I have already completed the health report for this vehicle, now I need to click on “Report” at bottom and enter the relevant information, click on “ok” and it will give me a PDF version.


Next I choose “Save as PDF”.

Now I can exit the launch software, I have Adobe Reader installed, I open reader and find the file, after it loads I go to the menu at the top right corner and click on “Print”.


That’s it. I hope it helps.

Enjoy!
https://www.obdii365.com/service/how-to-set-up-mini-wifi-printer-for-launch-x431-vv.html
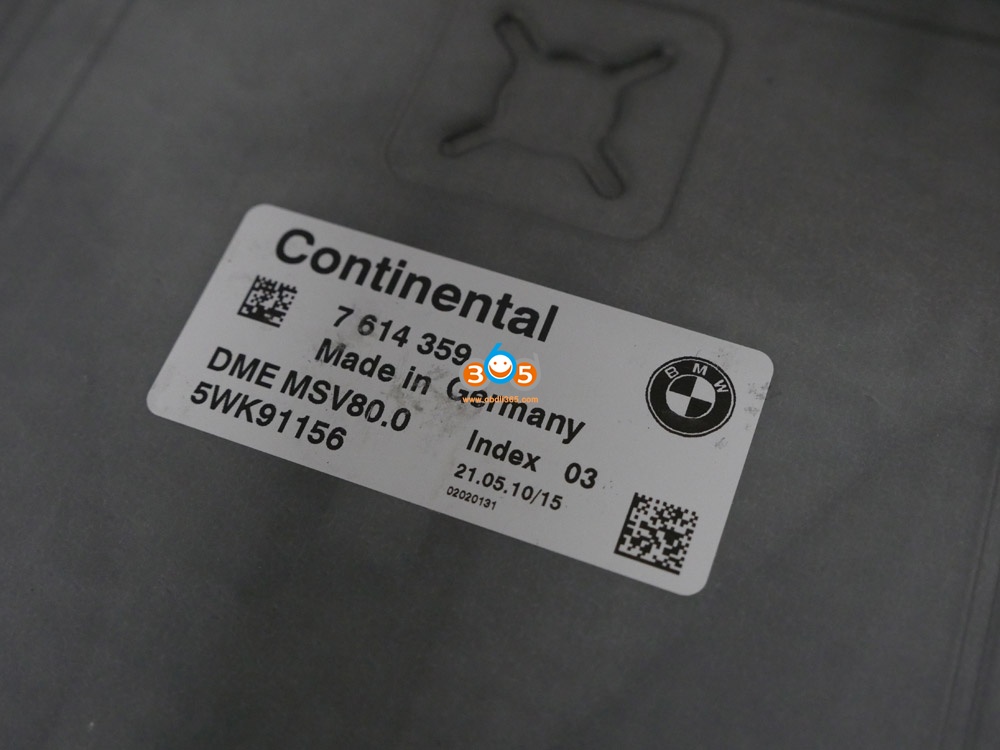
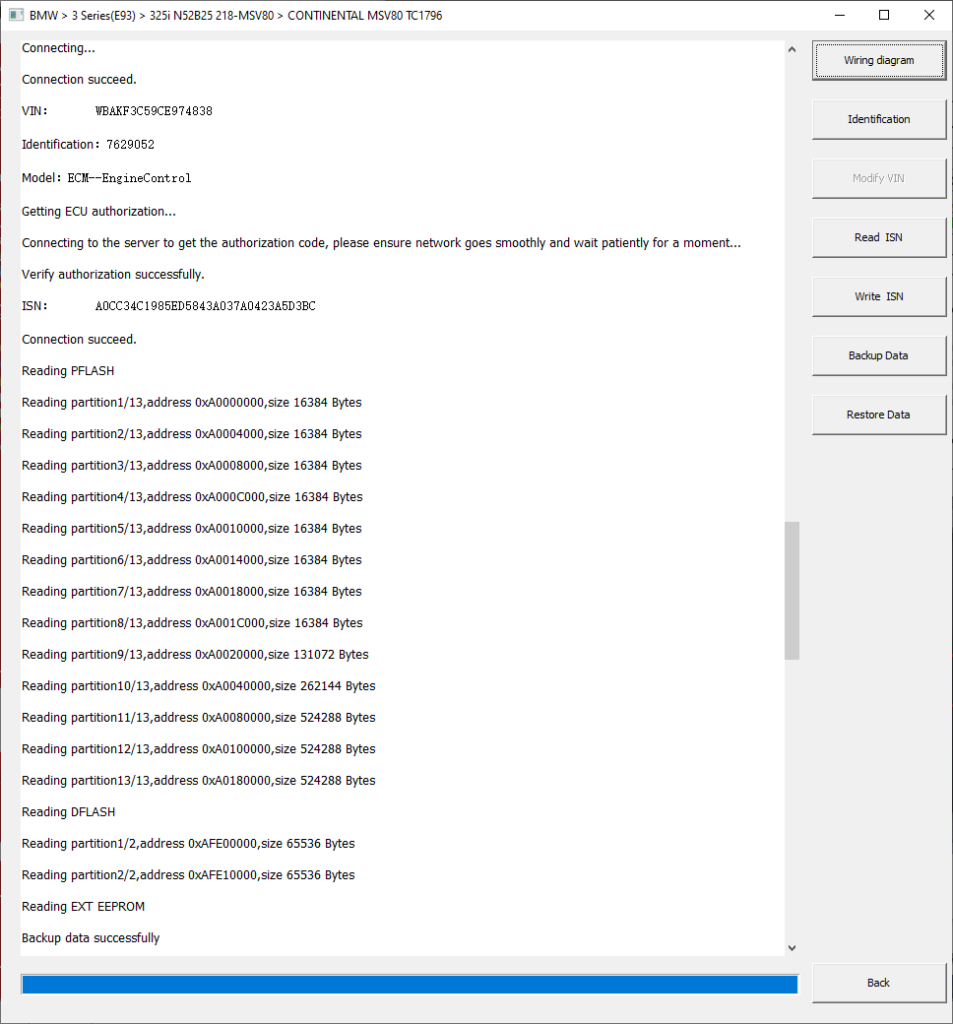
AT-200 ECU Programmer Clone MSV80 DME on Bennch
I’d like to share my experience with the AT-200 ECU Programmer and MSV80 unlock upgrade. I had three codes on a customers’ vehicle that came in 2011 BMW 328Cic:
2E7C BSD (Bit-Serial Data Interface) data bus communications fault
2F71 Digital Motor Electronics (DME): electronics box fan, activation
2B3D Diagnostic Module Tank Leakage (DMTL), system fault
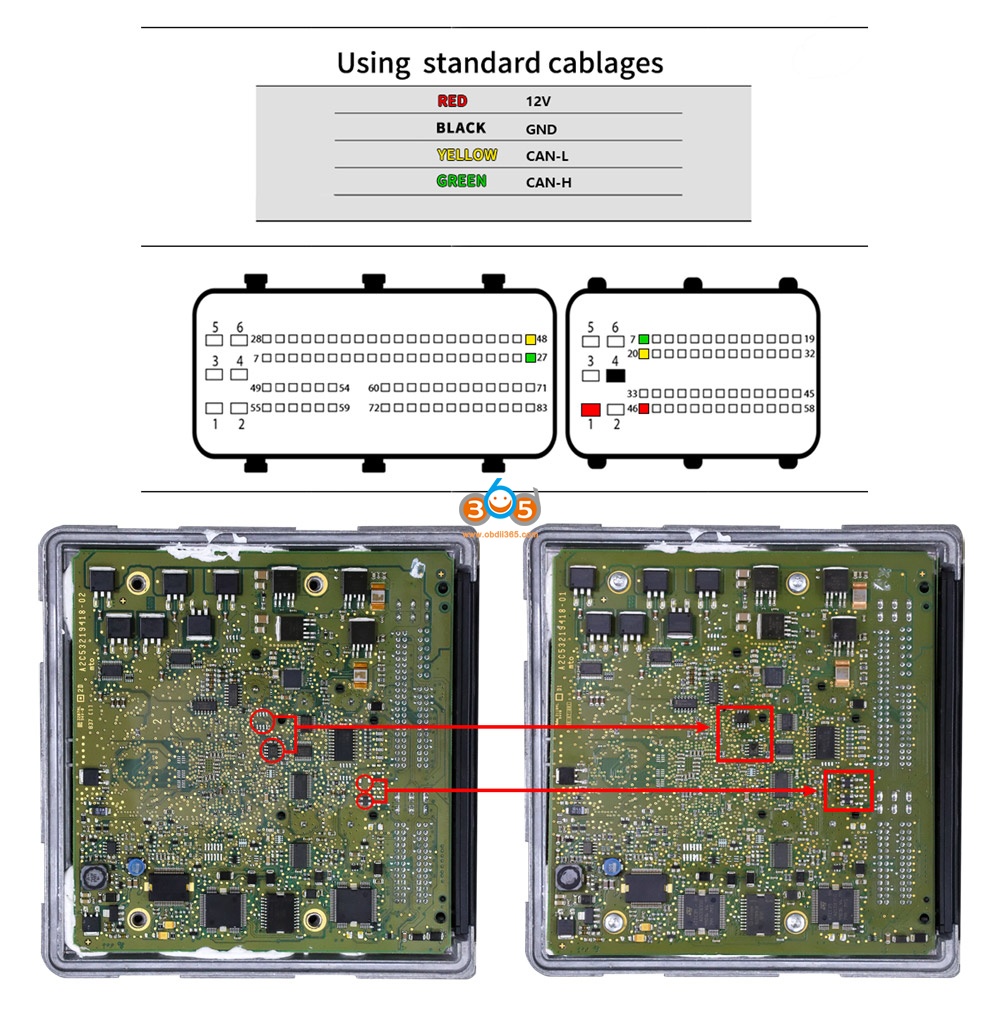
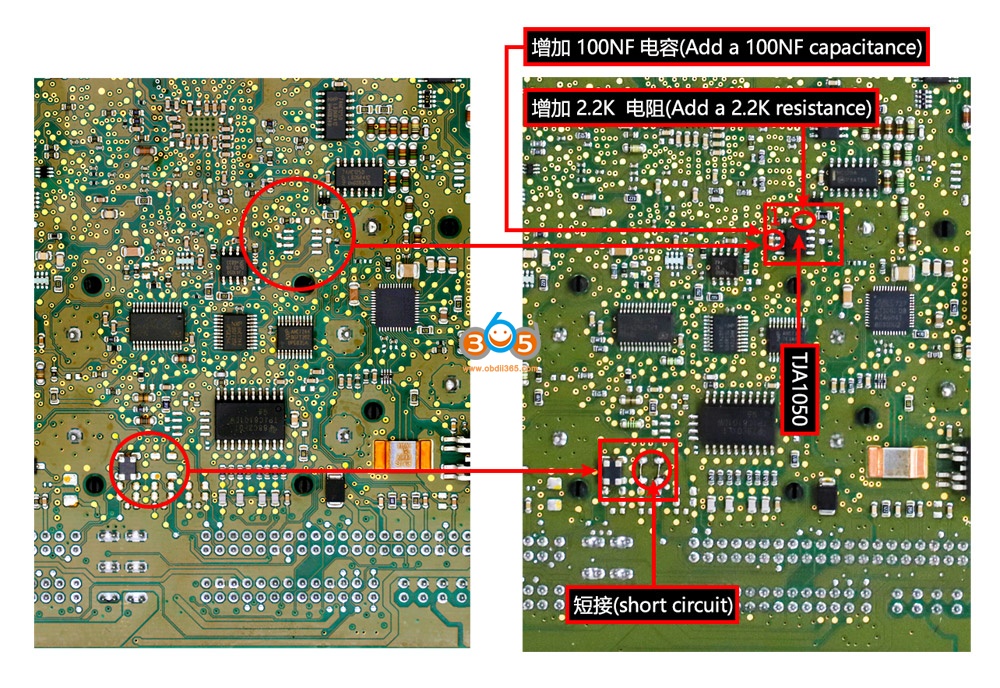
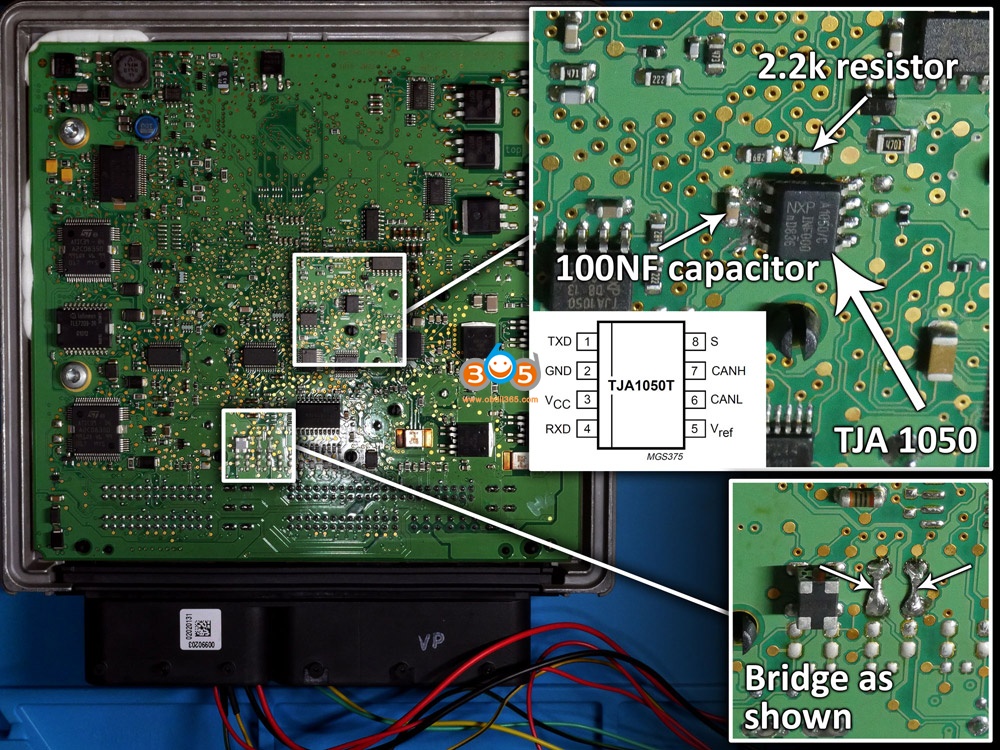
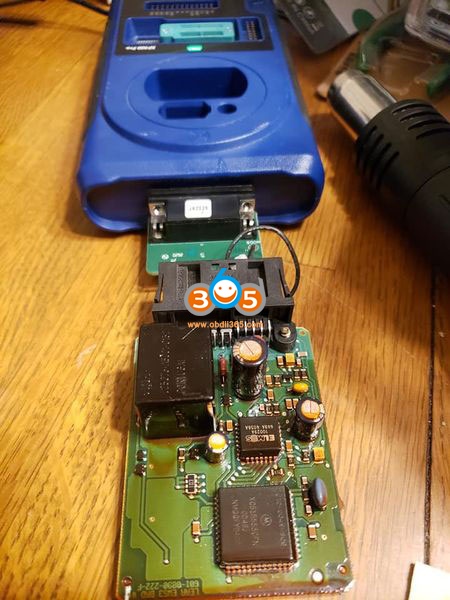
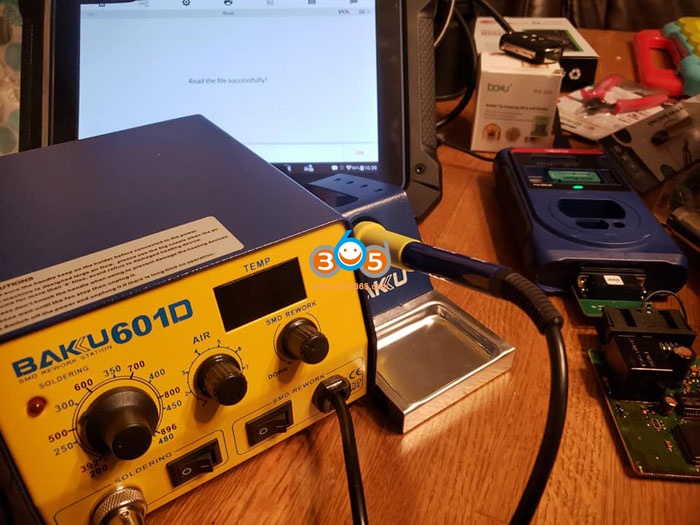
While it’s possible all these present faults could be true, it would still be unlikely so I decided to replace the DME. I had used the AT-200 to replace other ECUs without issue and very easily (MSV80 license is required), however, the MSV80 instructions involves soldering chips on to the board and the instructions are just a small resolution image. I did not know the orientation of the TJA1050 so I used a multimeter and the data sheet of the chip to determine the correct orientation on the board via voltage and ground. For the other small resistors I did not know the size and ordered them based on guess and parameters given. They are 1.6mm in length. I also had to add another CAN-H and CAN-L wire to my AT-200 plug.
Chips I used:
771-TJA1050T/CM118 TJA1050T/CM,118, 594-MCT06030D2201BP1 MCT06030
D2201BP100, 80-C603C104K5RAC3121 C0603C104K5RAC3121
After adding the chips I had no issue reading ISN, writing ISN, and for me Backup and Writing of the DME. I plugged the DME in the car and started it right up without any other ISN changes to CAS or anything else.

Good to know:
- Please make the connections shown in the above image 4, because someone feedback he tried to identify the ecu he get the error: connection failed.
- You are at your own responsible for any risk when you make the connections by following the above images, because it is from one AT200 user @ wase17.
Alright, hope this article helps those in need and who are curious about this AT-200 ECU Programmer.
Publicité
Which Tool can do Porsche Panamera 2018 Service Reset?
Since the service interval reset of Porsche Panamera 2018 Hybrid cannot be done by our own tester, it is a request from the same trader to do it.
Although it is a 2018 model and an older model, when I first tried it with LAUNCH CRP239 that it could be done easily, although there were items, when I executed it, a message like "Power was cut off" appeared in the meter It cannot be reset.
Is it impossible with LAUNCH? .. .. Disappointed, the AUTEL MS909 can afford it! And MS909 are connected, and when you click the service reset, "Confirm that you are connected to the net" is displayed, and it seems that it resets online.
Since you are connected to the internet, click "OK". It seems that AUTEL has not yet supported it because it says "not supported" when I look around and expecting what will be displayed next .
Does Porsche even have to do a service reset online at this model year? .. .. I felt a little uncomfortable when it was a difficult time, but next time I connected BOSCH with no use .
The service reset was not supported just because it was found that "service reset is possible only with the diagnostic machine".
Finally, I thought that LAUNCH would not be compatible because it was impossible with CRP239, but I connected LAUNCH's highest peak model " X431 PAD V ".
It was a bit different from the usual procedure, but it was easy to reset offline instead of online functions.
After all, regarding Porsche, it was Panamera's service reset that I was convinced that PAD V was one step ahead of other general-purpose machines .
If you are interested in X431 PAD V, contact
Whatsapp: +86 18259252285
Email: Sales@OBDII365.com
Skype: OBDII365.com
How to Activate Thinkdiag with All Brands and Reset Functions?
Thinkcar Thinkdiag can be activated with PRO Software for full car brands with special functions.
What’s included of THINKDIAG full software pack?
-Full car brands. All manufacturer software for free
-All special functions unlocked, ECU coding, Bi-directional testing and adaptations.
How to to activate thinkdiag to full brands?
Way 1:
Purchase Thinkdiag All Car Brands Activation License
Provide your Thinkdiag adapter serial number to oobdii365.com customer service
You’ll be informed once activation is done.
Way 2:
The official website ThinkDiag offers a good price for activation of all car brands.
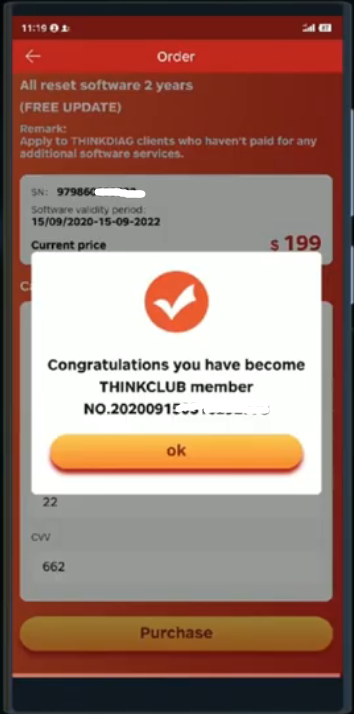
The official website offers all car brands (115 PCE) for 199$ including reset of service intervals (16 PCE) with 2-year updates.
Download latest Thinkdiag App
Go to ThinkStore, press yellow icon
Select All manufacturer software 2 years & All reset software 2 years (Free update) pack, Press Next
Fill in payment information
Purchase license
Now enjoy thinkdiag with all car software.


Activation of Thinkdiag is possible for all car brands. The full package of car brands is available with 2 year of updates. After two years, you can renew your subscription or use those car brands that were downloaded at the last moment. In case you do not plan to renew your subscription, keep a folder with the car brands. Then, if your tablet is lost or broken, you can transfer all data to another Android device without buying a subscription.
Activation of all brands is only available for Android. Users of iOS devices can use the official Thinkdiag software. Truck activation is also available with annual updates. To activate Thinkdiag, you should first check the adapter for proper functionality.
*Activation of ThinkDiag on your own is impossible. The only way out is to disassemble the adapter and change the chip.
Is it worth buying full activation?
You can buy Thinkdiag with 2 free car brands. After one year, you will have to pay for software renewal. The renewal of the car brand is USD 39.95, the renewal of resets is USD 49.95.
All car brands can be opened with 2 year of renewals. Trucks are also available which can be connected via a 24 V amplifier.
To use the scanner with all car brands, there is Launch (X431 V, X431 V+) still available. In other cases, when the scanner is purchased for personal needs for 1-2 cars, you can consider Thinkdiag obd2 scanner.


Q: app download link thank you
How to Fix Lonsdor KH100 Failed Detect Key via Repair File
Offer working solution to Lonsdor KH100+ error ” can’t detect a key”. Thanks to obdii365.com engineer.
First, let’s describe what the problem is.

Image 1: Turn on Lonsdor KH100+, agree the disclaim, enter “Identify Copy”, as shown in the pic, put a chip, click OK. And it always shows “Please wait, identifying” and no key result.

Image 2. Back to the home, enter “Remote control function”, then “Remote Frequency”, put remote control to detect, and the frequency is :0.000 Mhz.
So, what is the solution?
Please download KH100 Update Tool.exe here:
https://mega.nz/file/8VxhiKJL#JH4mL8a6PSFEeZGDi_kUzzfNivP6JFS2ajxqGmjj3P4
It contains “Steps video.mp4” guiding you how to use this .exe file.
Steps:
Step 1. Install .Net Framework 4.6.1.
Step 2. Unzip the above file.
Step 4. Use the USB cable to connect Lonsdor KH100+ to the computer, long press the “Down” button for few seconds and then press the power button once.
Step 3. Hold the “Down” button for a few seconds and press the power button once, you will enter USB data mode.
Step 5. Open the above repair file, click on “KH100UpdateTool.exe.”, then “Update”, soon you can see “Update completed”.
Step 6. Back to KH100+ and press “OK” button, and the device will update automatically, you just check whether it will work normally.


Alright, any question on Lonsdor KH100+, contact at www.obdii365.com
How to Solve Launch X431 V 8 inch has Stopped Error?
My Launch X431 V 8 inch tablet worked find but today it reports 2 errors:
"X-431 V has stopped"
"DiagbaseService keeps stopping"

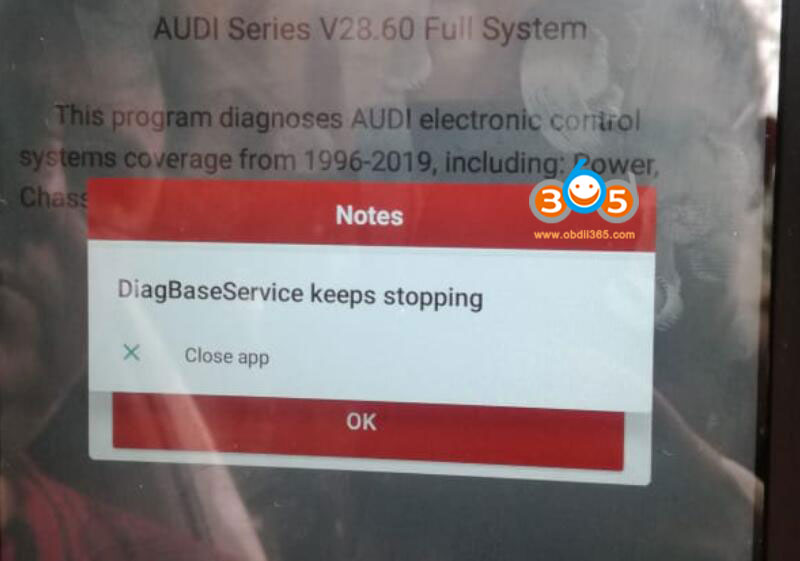
Obdii365.com solution:
Delete current App
Visit official website www.x431.com and go to Services & Support menu.
Download X431-V App and try again
Publicité
Solved! Xtool Keeps Giving Network Error
Problem:
I received the Xtool PS90 tablet. When register to activate the scanner, it kept giving network error but network is working my account keeps informing me i signed in but the tablet says not its frustrating any software i can download to fix?


Solution:
Check network connection. If network connection has no problem. The error may cause by the low App version.
Delete older Xtool App and install latest version. Problem will be solved.
The solution fits other Xtool products, X100 PAD, X100 PAD2 etc.
How to Make Fiat 500 Dealer Key by Autel IM608?
Question:
Fiat 500 add two new keys but how do I make them dealer keys so they will program by the Autel MaxiIM IM608 ? I have one working key and im608 read pin correctly.


Suggestion:
Need to read immo data first there should be make dealer key option once you’ve ready immo data. It’s not just pin must read immo data. You have to read immo data make a dealer key learn the keys 100% .
If you have a working key you select 2 keys to program or in this case you would select 3 keys to program as you wants to add an original and 2 new remotes.
Program working key first followed by the next 2
Unavailable keys are only erased permanently from the system and cannot be used again once the procedure has been completed.
Go into immo system first and you will see -
Read password
Generate dealer key
Program key
Follow in that order
Program original in first followed by 2 new keys.
User feedback:
Turns out the Autel im608 read it as an arbarth but in arbarth there no precode functions to read the actual bcm and then make the dealer keys. So I handy I go in manually into fiat - fiat 500 instead of by vin into arbarth. Once in there the read immo data function was there so I did that abs then made the dealers keys in the xp400 then moved on to code them in the ignition.
http://www.key-programmer.org/2021/02/19/tips-to-program-fiat-500-dealer-key-with-autel-im608/
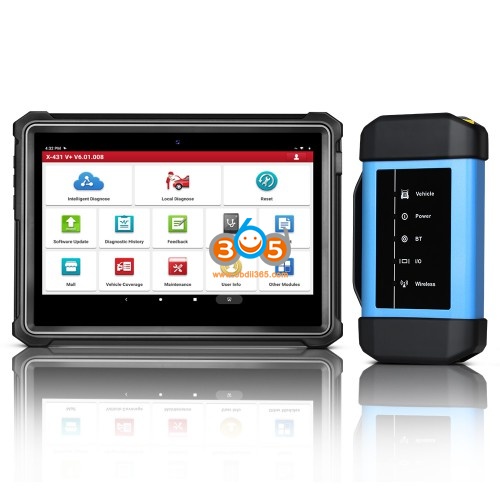
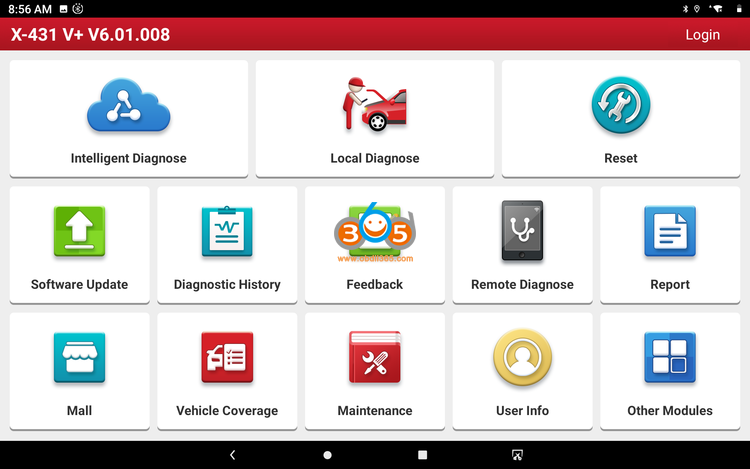
How to Register and Update Launch X431 V+ with HD III?
Launch X431 V+ and HD3 Module is more than a professional diagnostic tool for heavy duty truck till2020 year, it also performs 15 special functions. It’s nice features are Simple tablet appearance, high-definition touch screen (1920*1200), high-speed running speed (Lenovo Tablet TB-X605FC, Android 9,RAM 2G Storage 32GB CPU Snapdragon 450 Display), it also supports multi-language English, German, French, Italy etc.
However, to protect Launch X431 V and data safety, also enjoy the free update, you are required to register a member for the first time.
There are 6 steps to follow:
Step 1. Choose “Login”.
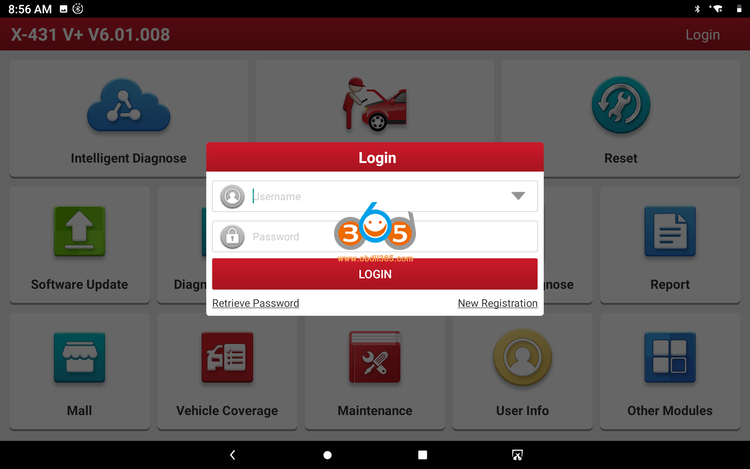
Step 2. Choose “New registration”.
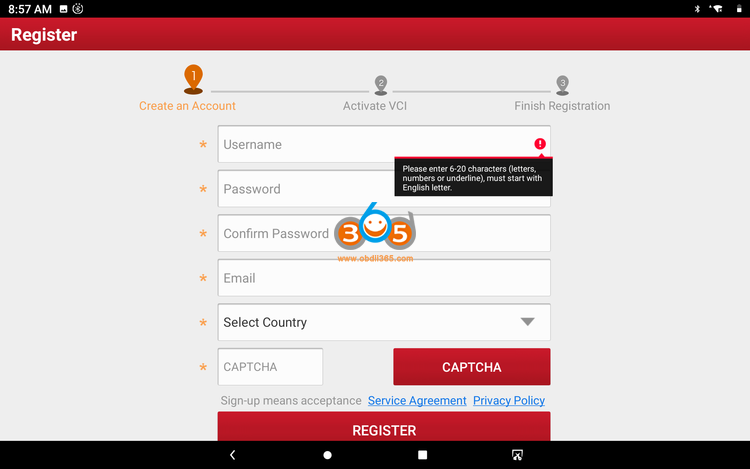
Step 3. Input the user name & password, input the password again. Input the usual email address. Choose the country. Input the CAPTCHA verification code. Tap “Register”.
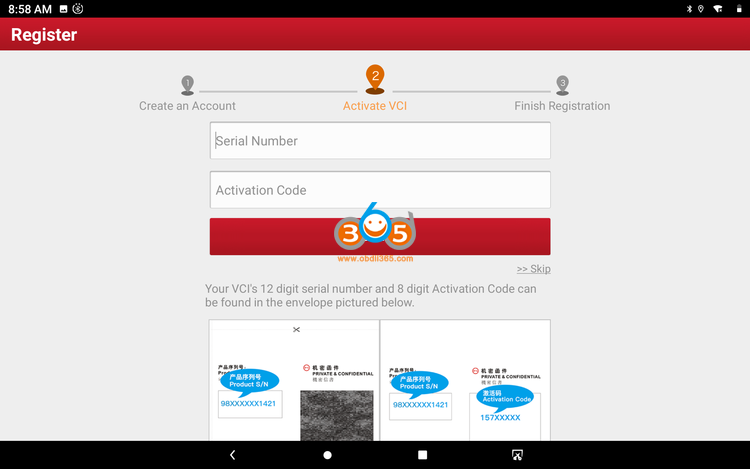
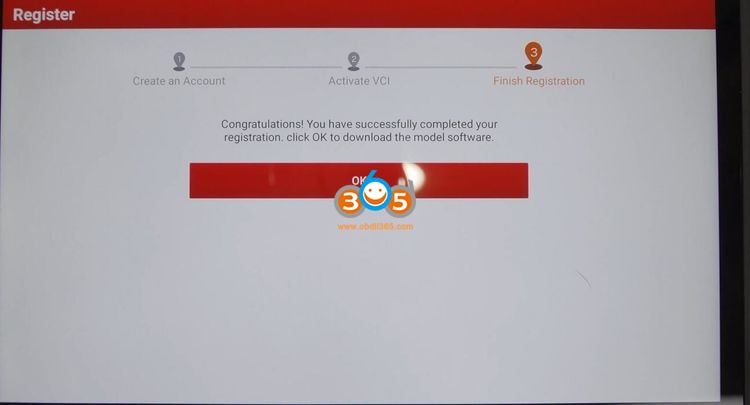
Step 4. Open the envelope in the product, input the SN number inside, and activate the password–click ACTIVATE
Step 5. Congratulations! you’ve registered successfully, you are ready to use the machine.
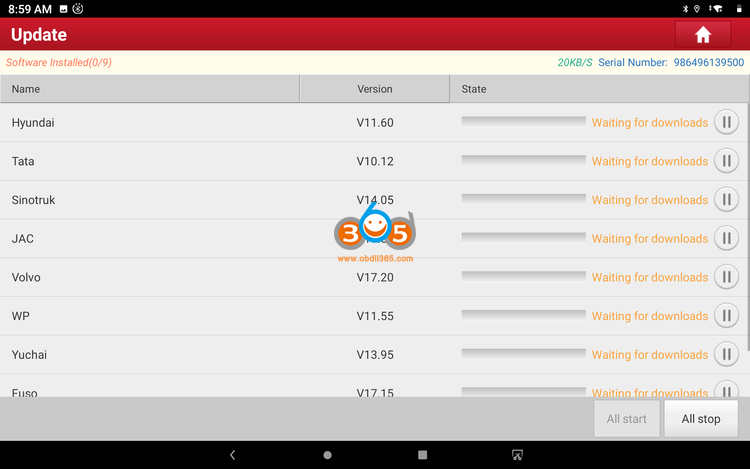
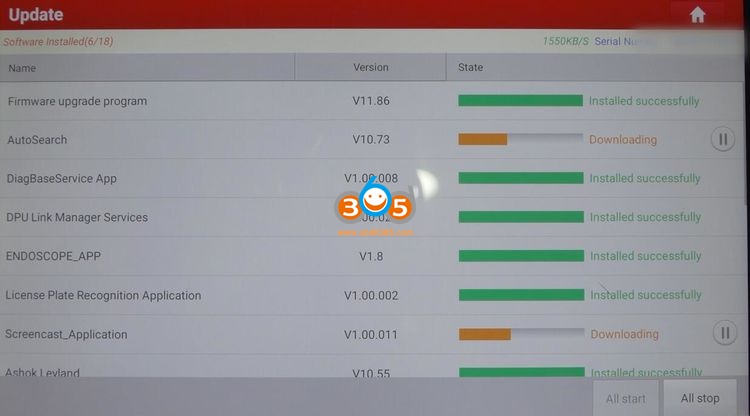
Step 6. Software update.
Select all available newest truck software to update, just wait until it succeed.
Besides, after entering “User Info”, there are ” Activate VCI” and “Firmware Fix”, just click on them and follow the screen to do.

Now you start take advantages of that Launch X431 V+ and HD3 Module bring you.
It has a wide vehicle brand coverage: truck, bus, machinery, Engine, New Energy.
It optimize a new function “Camera scan VIN”.
It can do: read vehicle information, read DTC, clear fault memory, read data stream, read freeze frame, actuation test, feature and parameter, advanced ECM data.
What’s more, it has one option “Feedback “. In the process of testing, if you can’t test or encounter other problems, you are allowed to submit the logs in testing to the Launch server. Then the engineers will analyze and find out the problem to help you solve it.
This is only for 12V to 24V diesel truck only. If you need to diagnose both gasoline and dieselvehicles, please check LAUNCH X431 V+ with HD III for Cars & Trucks.
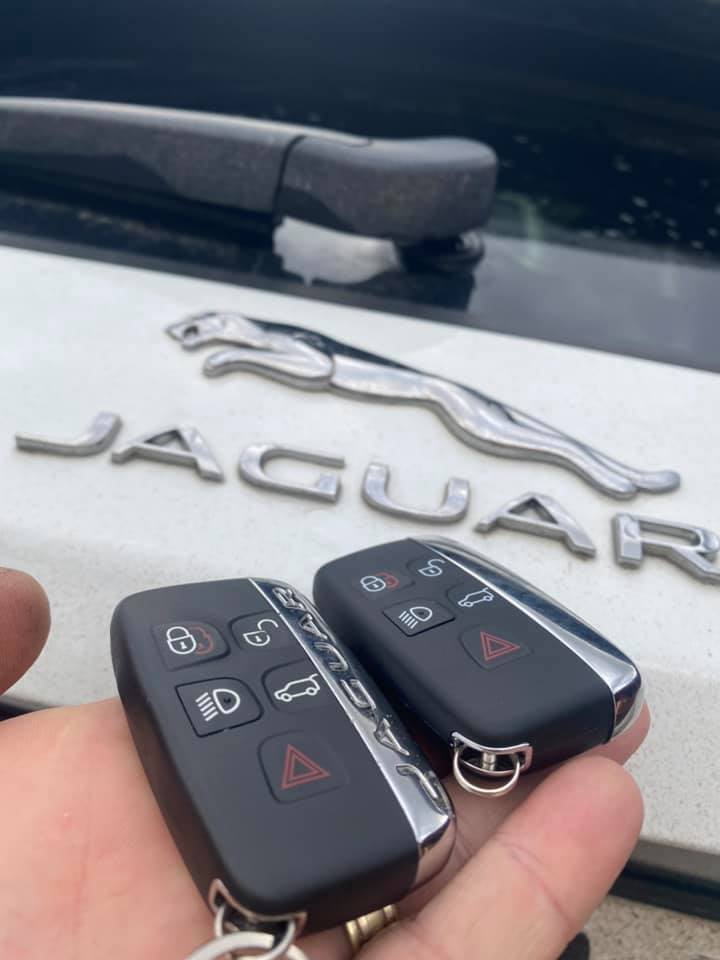
Autel IM608 Adds Jaguar F-Pace 2016 Smart Key Success
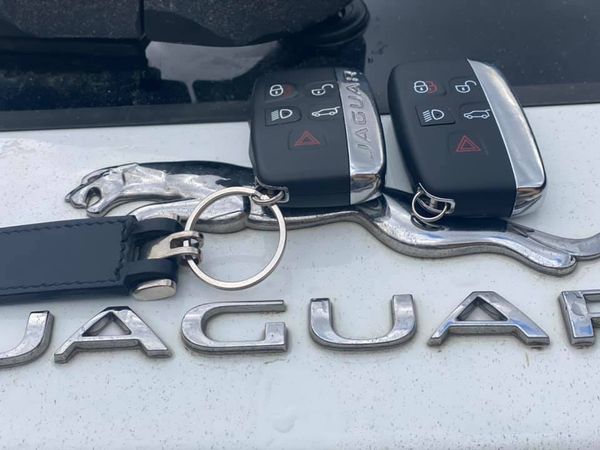
I have added a smart key (5 buttons) to a Jaguar F-Pace year 2016 using Autel MaxiIM IM608today. It is kvm out job. A safe and emotionless work.
Mask 1M12S MC9S12XEQ384.
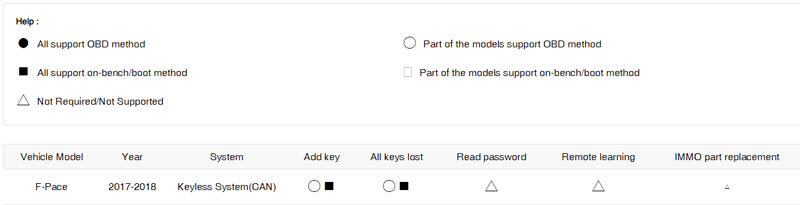
The Auteltech lists only F-Pace from 2017 to 2018. I did a 2016 model no issue.

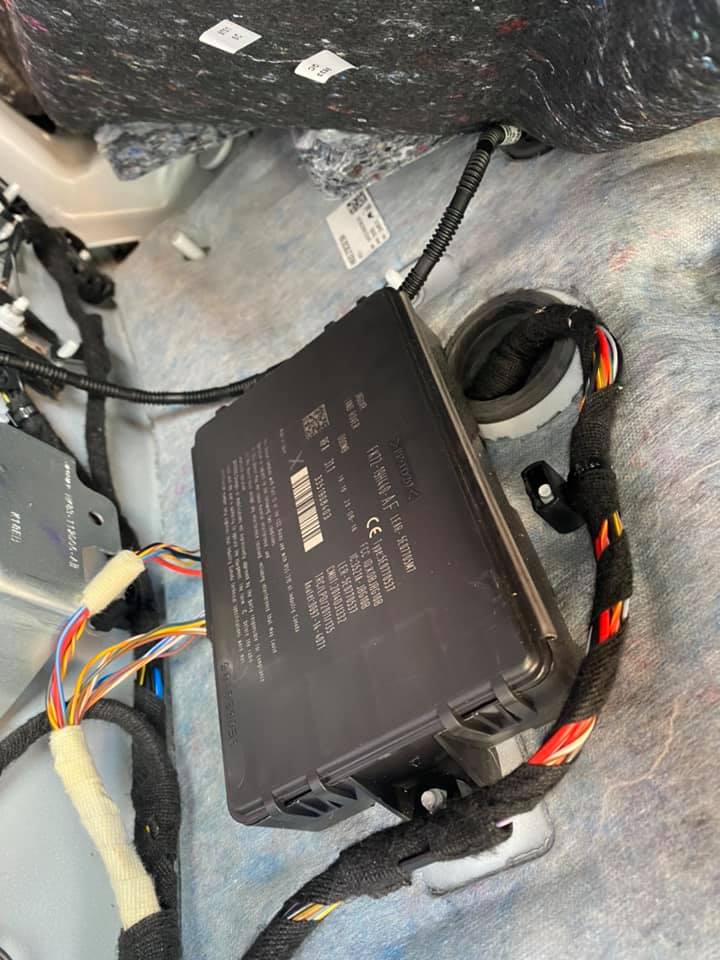
Remove KVM module and follow operation guide in IM608
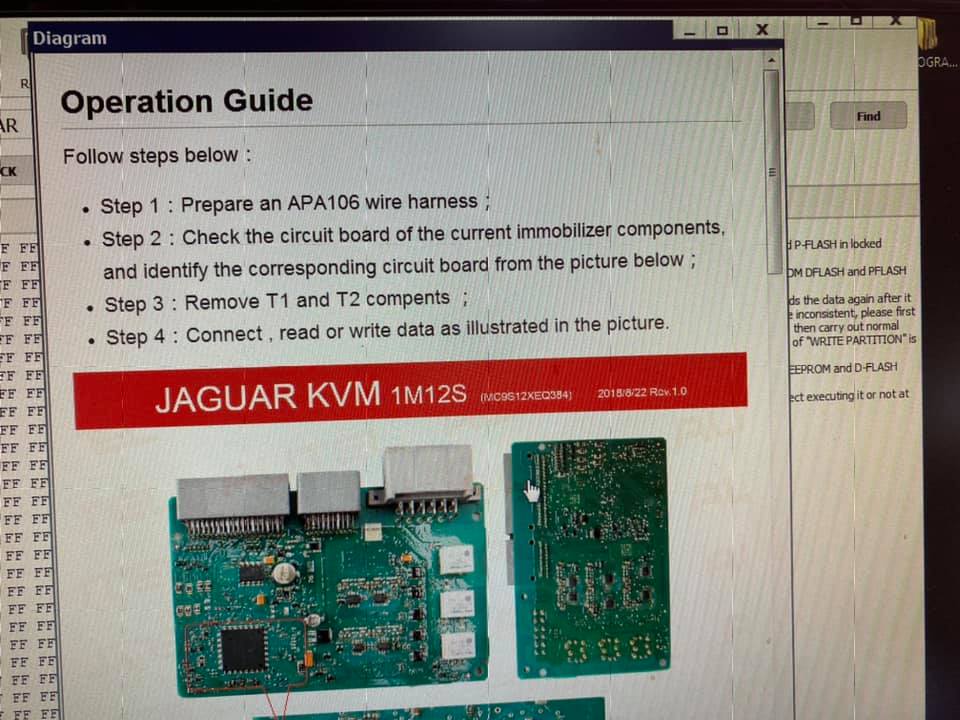
Prepare an APA106 wire harness.
Check the circuit board of the current immobilizer components and identify the corresponding circuit board from the picture below
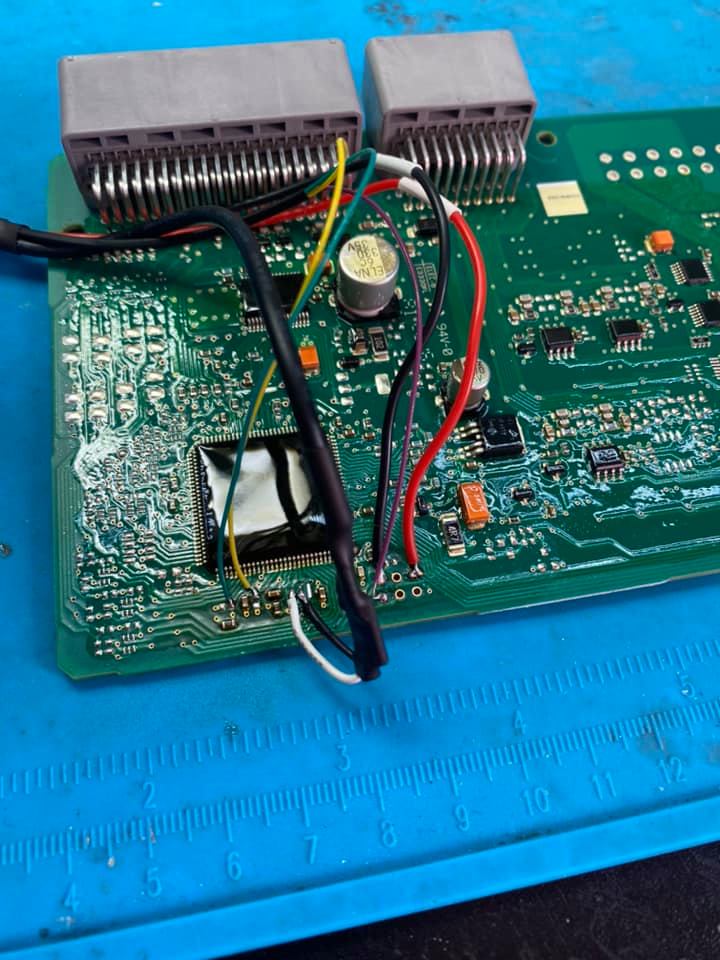
Remove T1 and T2 components
Connect, read or write data as illustrated in the picture
Then follow autel im608 prompts to add a dealer key


http://www.key-programmer.org/2021/02/05/autel-im608-adds-2016-jaguar-f-pace-smart-key/
Publicité
Godiag GT100 Breakout Box Test Reports
Godiag GT100 Breakout box is tested by an increasing number of users, they all think highly of it for what it do, in short, it is good quality, easy to use, help save much money, helps narrow down the issue etc.
Please read carefully what they’ve tested, overall the review is unbiased, not from the seller:
- Very well made, solid junction box with good quality strong harness and connectors.
Great bit of kit, easily connected to car using ECU modules and straight forward to use.
Great value for money, able to use on multiple vehicles.
Overall, great product if you want to control you own destiny with car fault codes.
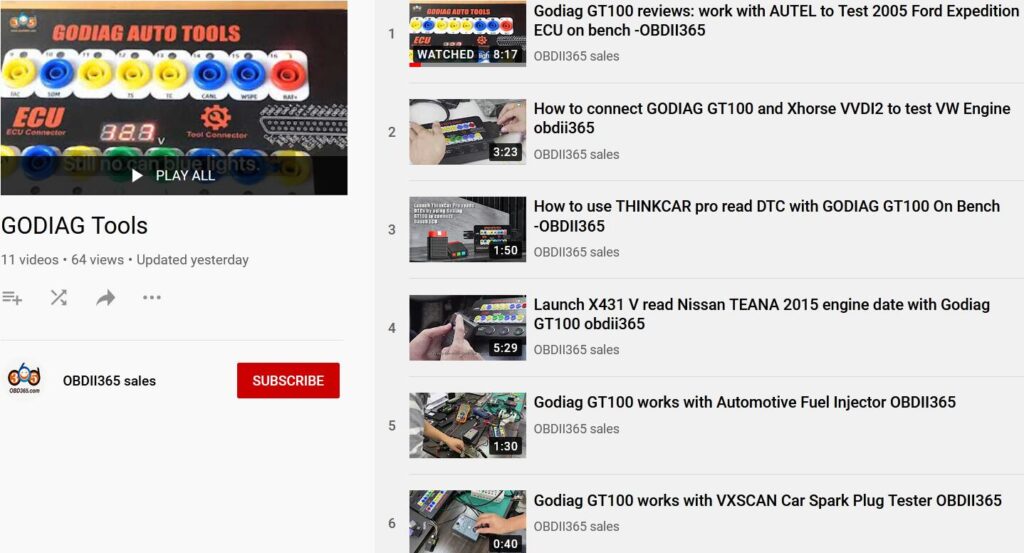
For some users feedback there is no instruction in the package, the manufacturer will arrange add it in the package. So far, please refer to obdii365.com videos, the below link include all we tested:
https://www.youtube.com/playlist?list=PLYFyJLWubsfvyyQS1cKaBeloa7TUO87c0
The package comes with plenty of adapters, jumper cables and accessories for use.
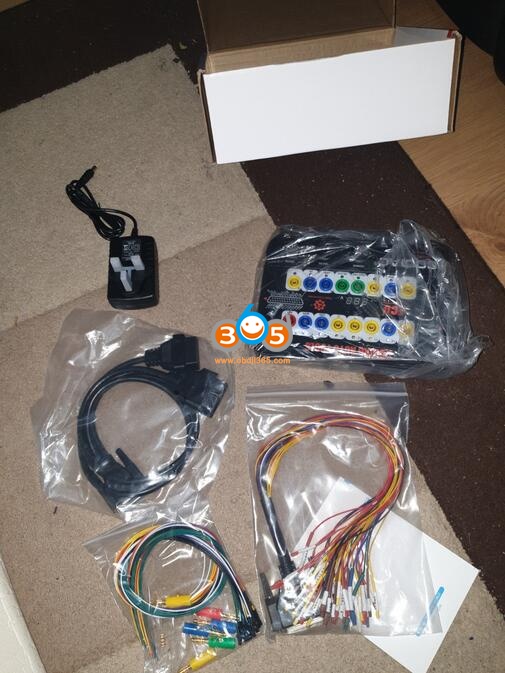
- for doing diagnostics, vehicle immobilizer & security work whether it be on the bench with the included power adapter or in the vehicle with the OBD II port supplying power.
- I always use this to verify that the networks are communicating properly and that there is proper power and grounds being supplied to the box assembly. You don’t want to hook your very expensive scan tool up and it be fired because you didn’t have the proper powers and grounds from somebody’s previous shoddy work on a vehicle.
- Godiag GT100 is the easier one comparing with other brands of Breakout boxes, it comes with additional features for doing ecm, ecu repair on vehicles.
- For diagnosing your car when you have a check engine light, having this definitely helps us narrow down the issue.
- Reset the check engine light
- Can save your settings on your radio when you change your batteries, it is very cool.
- Able to use GT100 without having to get a scanner. It has the potential to save money on diagnosing car issues and repairs. Mine has worked well with great accuracy.

- Can be connected with multiple modules. Strong compatibility, making use and diagnostics more integrated and robust.
- Give early stage of signal/alert that need to work on before it completely breakdown, this helps to save a fortune and avoid a great chance of standing in the middle of nowhere waiting for rescue.
- Godiag GT100 supplies the vehicle with power when you are transferring batteries to avoid data loss which is another plus to this box.
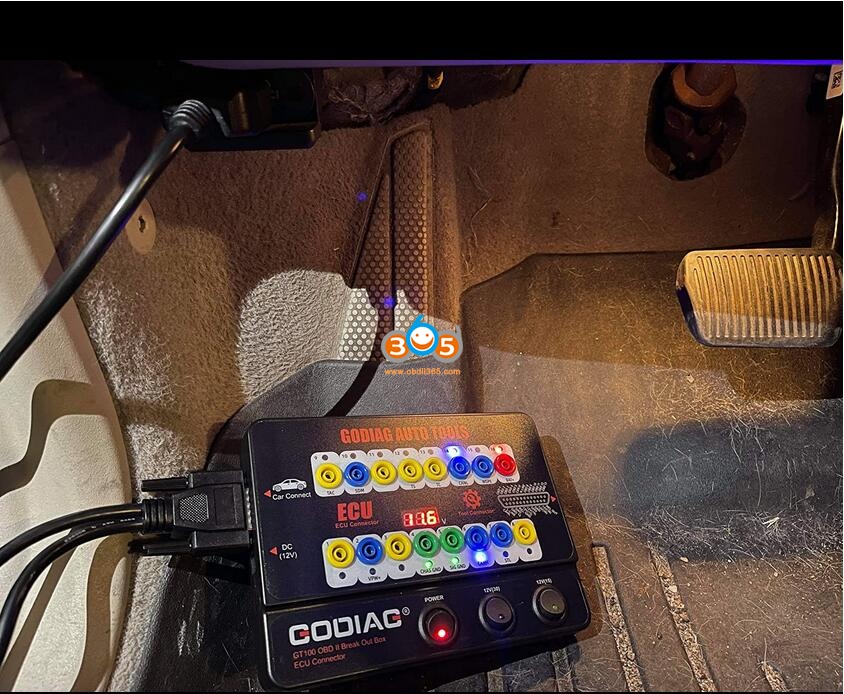
- 12. Using a Vident scanner and the Godiag GT100 breakout box to perform a bench test for the ECU remove from the car (with can-bus error, airbag light on and niggling power problems, but no idea get any further). Turned out to be a corroded pin that was preventing the communication. Great outcome and saved a fortune. Fantastic bit of kit and you don’t need an expensive scanner to pair with it.
- Plugged the socket under the dash into Godiag GT100 and turned the ignition. Soon after, a few of the LEDs lit as we expected with varying levels of brightness. The brightness of the LED also requires interpretation, as a weakly lit LED lets us know how good or bad the particular part of the car is.
- Used Godiag GT100 on a Mercedes and the VVDI2 platform. If you know what you are doing it’s a great tool which shows the results in real time.
…
Godiag GT100 Breakout Box Using tips:
Please make sure you’re fully aware of the capabilities and use of GT100 as with little or no experience just as with other tools, equipment you can do thousands of dollars to a vehicle if not properly trained or knowledgeable with what you’re doing.
Enjoy!
LAUNCH X431 PAD V Updated Subaru ECU Reprogramming
The Subaru ECU reprogramming function has been added to LAUNCH X431 PAD V, take a look at how to do it.

If you select "ECU reprogramming", ...

There are three ways. Select "Manual selection by vehicle".

It seems to be compatible with these car models.
XV
WRX
Tribeca
Outback
Levorg
Legacy
Impreza
Forester
BRZ

If you select "Select by ECU part number", it seems that it will search for software that can be reprogrammed by entering the part number of the currently installed ECU.
For Launch X431 PAD V, please contact
Whatsapp: +86 18259252285
Email: Sales@OBDII365.com
Skype: OBDII365.com
Which Adapter to use with XP400 Pro to read EWS32?
Although BMW EWS is a very easy job can be done by cheap AK90 at $30, it is just nice to know Autel MaxiIM can do EWS3 if happens to have it in hand.
Which Autel can do?
*XP400 cannot read/write EWS3. Require XP400Pro.
What adapter to use?
Ews3 adapter (APB114 EWS3 adapter board) the tool tells you what to connect the wire to
APB114 EWS3 adapter is included in IMKPA Accessories (Needs to Buy IMKPA AccessoriesSeparately).


Test report:
EWS3 flawless using Im608pro+ imkpa in ews3
also write a key
Adapter is APB114
I have the ak90 I just choose to do it this way and it worked out a whole lot easier and faster


FYI: IM608 does EWS4 as well. Doesn’t require EWS4 adapter, direct read and write.
