Overblog Tous les blogs Top blogs Automobiles & Véhicules
Suivre ce blog Administration + Créer mon blog
MENU
Publicité
OBD2 Diagnostic Tools
Articles récents

FAQ OBDSTAR Old and New KSIM Smart Key Emulators

22 Décembre 2020 , Rédigé par JTAC Publié dans #OBDSTAR X300 DP

 Breaking news !!!  OBDTSAR X300 DP Plus new Toyota V32.37 software has released to make it compatible with simulator card 1-4.  These emulators were cancelled before because of the server breakdown.


With these simulator keys,  users are allowed to program following type of Toyota smart keys when all keys have lost. 

Emulator key 1 for Toyota smart key 94/D4 type

Emulator key 2 for Toyota smart key 98 type

Emulator key 3 for Toyota smart key 88/A8 type

Emulator key 4 for Toyota smart key A9 type


obdstar-toyota-simulator-1


*These simulator keys are cancelled products.  For people who have bought the emulators, update your x300dp plus Toyota software and use them again.


Some FAQs about the OBDSTAR simulator keys:

Q: This can work with obdstar x300 pro3?

A: No, these emulator keys work with X300DP Plus (key master dp plus) only.


Q: Toyota keyless go programming possible in AKL? 2017+

A: Yes


Q: What about the people who ordered the P001 with the 4 emulators but only received the yellow one, will you send them the 3 missing emulators?

A: Only the simulator card 1 (yellow one) is available in x300dp plus default package. Other emulator keys are not available now.


Q: Where can i buy these emulators? Does it come with the x300dp plus?

A: The emulators used to included in the P001 package. But now there stop production. x300 dp plus comews with 1 yellow emulator only.   OBDSTAR release a new all-in-one Key SIM emulator to replace these older ones, as the LKE to Lonsdor K518 or KC501 to Xtool.


obdstar-toyota-simulator-key-sim


With the Key SIM simulator key, you can

  • Collect 46, 4D key data
  • Calculate Porshce (2205-2010), Hyundai/Kia ID46 pin code online
  • Generate smart key for Toyota/Lexus 4D (94/D4, 98), H (88/A8, A9, 39) chip


Q: ksim (key SIM)works or doesn’t it work or do you have to buy the 4 emulators plus the ksim?

A: Key SIM is designed to replace the other 4 emulators. If you buy the new Key SIM, you are not necessary to buy other emulators.


Q: Does that mean that with this update all emulators will now work with vehicles from all countries? because before they only worked for vehicles from Asia

A: These emulators can be used to generated H chip smart key for Middle east and American Toyota .

But with the new OBDSTAR Key SIM emulator, it supports Toyota from all countries. 


obdstar-toyota-simulator-region


Video reference:

An example on programming 2016 Toyota Camry smart key AKL using emulator
 
Lire la suite
Publicité

Lonsdor K518 Program 2011 Toyota Prius 98 Smart Key AKL

21 Décembre 2020 , Rédigé par JTAC Publié dans #Lonsdor K518

 How-to: program Toyota Prius 2011 Smart Key (98 type) by Lonsdor K518ISE and LKE emulator when all keys lost.


lonsdor-k518-2011-toyota-prius-1


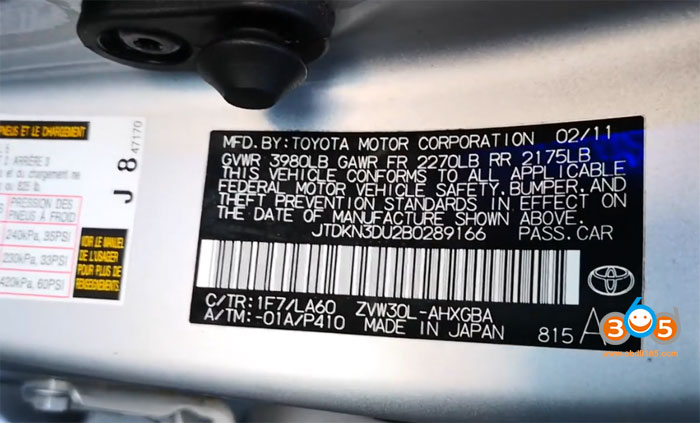
Japanese model


lonsdor-k518-2011-toyota-prius-2


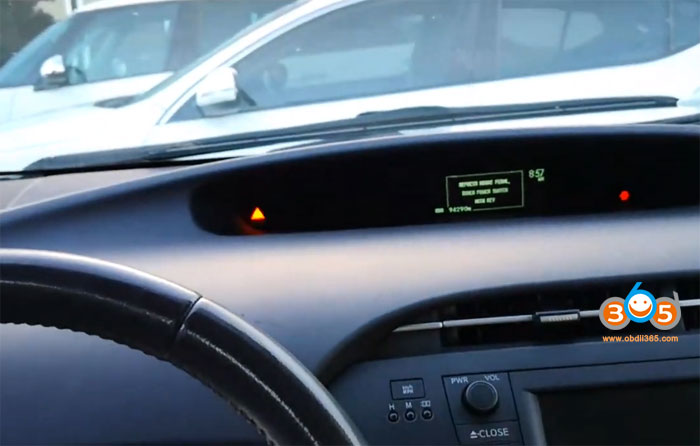
All keys have lost, cannot start vehicle


Tools required:

Lonsdor K518ISE key programmer

Smart key emulator (LKE emulator all in one or SKE emulator 98 type)

New original key

Note* Lonsdor can program Prius smart key and mechanical key (but can not program mechanical key with 8A chip)


Procedure:

Connect K518 with vehicle via OBD socket and turn on device

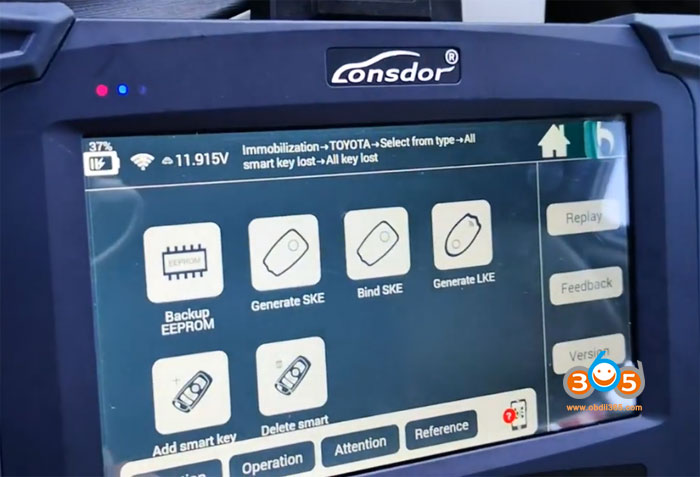
Select Immobilizer->Toyota->Select from type->All smart key lost->All keys lost->Backup EEPROM


lonsdor-k518-2011-toyota-prius-3


lonsdor-k518-2011-toyota-prius-4


lonsdor-k518-2011-toyota-prius-5


This function can back up car EEPROM data
When backup complete, go to Make Emulator Key to make an emergency emulator key
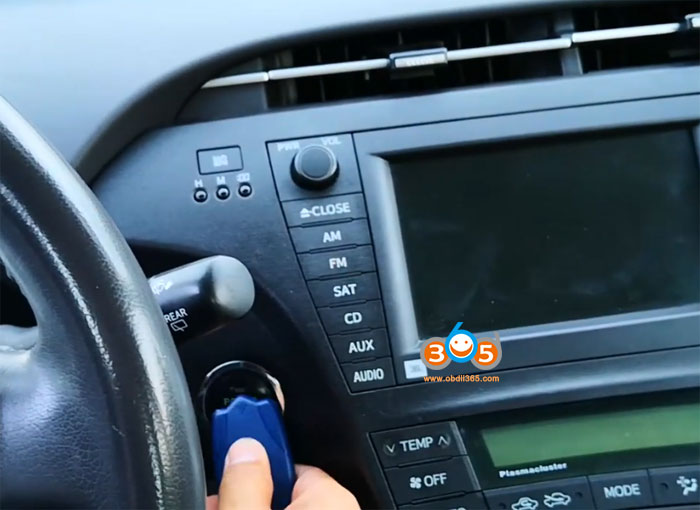
Use the key to touch the start button to ignite dashboard and add key


lonsdor-k518-2011-toyota-prius-6


Obtaining car data, about 3 minutes


lonsdor-k518-2011-toyota-prius-7


Save eeprom file


lonsdor-k518-2011-toyota-prius-8


Backup EEPROM success

Go to make emulator key to make a spare original key

Before using LKE emulator you need to bind LKE with Lonsdor K518 key programmer

Check guide here

[embed]https://www.youtube.com/watch?v=Zi3599gsLFo[/embed]

If using SKE emulator, it required to bind with device as well

[embed]https://www.youtube.com/watch?v=VCs4cnGHvVo[/embed]

Select Generate LKE function


lonsdor-k518-2011-toyota-prius-9


lonsdor-k518-2011-toyota-prius-10


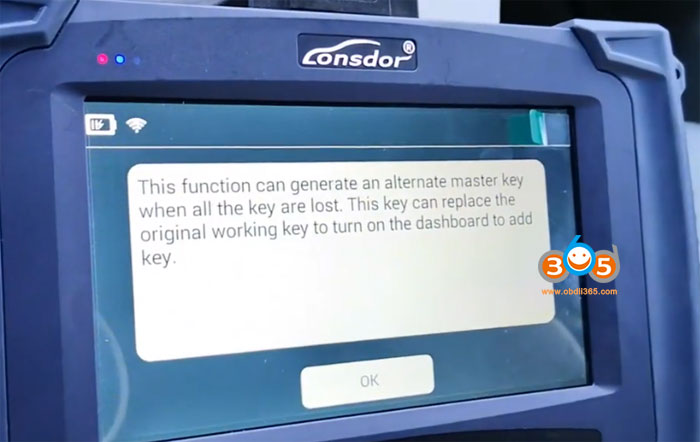
This function can generate an alternate master key when all the key are lost. This key can replace the original working key to turn on the dashboard to add key.


lonsdor-k518-2011-toyota-prius-11


Place key emulator into k518 card slot

lonsdor-k518-2011-toyota-prius-12


Select eeprom file


lonsdor-k518-2011-toyota-prius-13


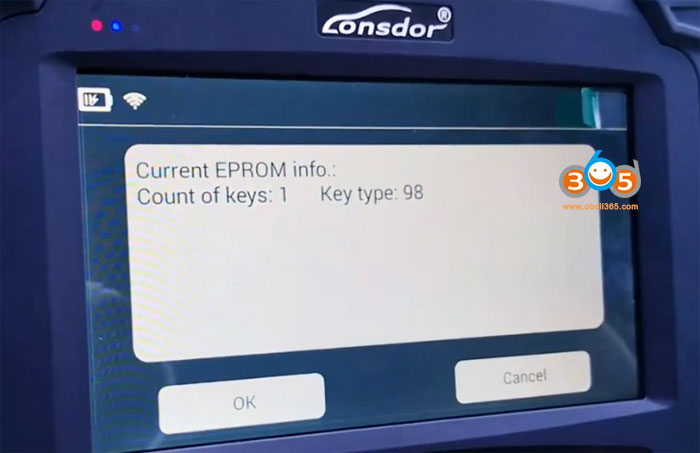
Identify key number and type: 98


lonsdor-k518-2011-toyota-prius-14


Put the LKE key emulator into k518 card slot

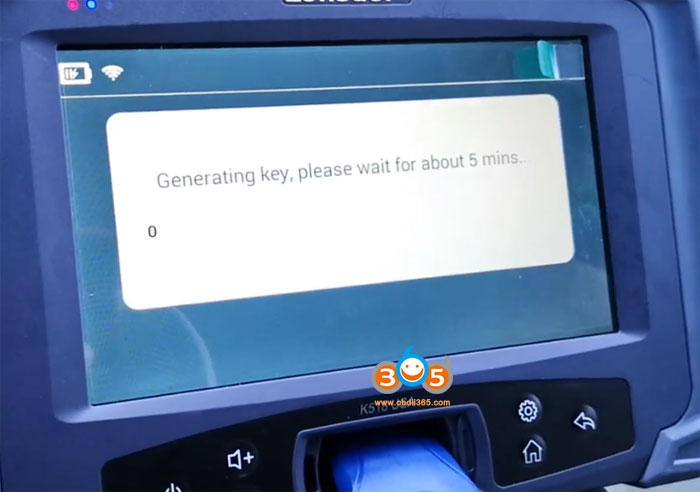
Generating key in progress,  wait for about 5 minutes


lonsdor-k518-2011-toyota-prius-15


Key is generated, put the spare key close to the ignition, turn on the dashboard, and select Add key function to program new key


lonsdor-k518-2011-toyota-prius-16


lonsdor-k518-2011-toyota-prius-17


Done.

www.obdii365.com


http://www.lonsdor.org/lonsdor-k518ise-program-toyota-prius-2011-all-keys-lost/

Lire la suite

Update GM! Vident iLink400 ilink410 iAuto702 etc

21 Décembre 2020 , Rédigé par JTAC

 Breaking news! Vident diagnostic & service reset tools (iLink400 / 410/440/450, iAuto 702Pro/700/701/710/730) free update 2021 & 2020 GM car (Chevrolet, GMC, Buick, Cadillac etc). What it can do is to read codes, erase codes, live data, read ECU info, active test, special functions.


FYI, the supported function may differ from one car model to another. Please refer to this Function list:

https://www.obdii365.com/upload/pro/20122016085321217877.xlsx

GM 2021 -2009 : Confirmed.


Applicable Vident devices:

-iLink400 (Full-system all-function diagnosis and service reset tool)

-iLink410 (Universal service reset tool, incl. ABS and SRS System Diagnosis, OBD II Diagnosis, ABS and SRS bi-directional test, ABS Bleeding, SRS Reset, Steering Angle Sensor Calibration, EPB.)

-iLink440 ( 4 system diagnosis for all makes worldwide.)

-iLink450 (Full Service reset Tool, EPB, Oil Service, ABS&SRS reset, Battery Configuration, Steering Angle Sensor Calibration, DPF regeneration and Throttle body alignment etc)


iAuto702Pro (Multi-Application Service Tool)

iAuto700 (Professional All System Scan Tool

iAuto 701, iAuto 710, iAuto 730 etc.


Seeing is believing:

We take Vident ilink400 GM scanner for example, select “Diagnosis” , then “Manual selection”, you will see there are option : 2021, 2020 … to 2009.


vident-ilink400-gm-update-2021-1


vident-ilink400-gm-update-2021-2


Firstly enter 2021 and have option: Chevrolet, GMC;


vident-ilink400-gm-update-2021-3


Then enter 2020 and have option: Buick, Cadillac, Chevrolet, GMC, Ravon.


vident-ilink400-gm-update-2021-4


Vident ilink400 gm scanner will access to a bunch of control systems, here are some examples:


vident-ilink400-gm-update-2021-5


Enjoy!


www.obdii365.com

Lire la suite

Will the used Autel XP400 work on other IM608?

17 Décembre 2020 , Rédigé par JTAC Publié dans #autel xp400 pro

Question: I have an Autel xp400 programmer. I will purchase an additional xp400pro. Can I sell my xp400? Will it be used on other im608 programmer?


Autel chief engineer replied: The used xp400 is not bound with im608 (they are independent), you can buy xp400 pro instead, and then sell xp400. It can be used perfectly with other im608 device.

You can sell yours on eBay for close to cost paid. Help offset the pro cost. But many people choose not to sell it. To be honest, it’s good to keep it as a backup, in case some problems occur and the pro is stop working. If the pro will not work anymore for any reason, you can still finish the job and charge the customer.


Then, where to have one Autel xp400 pro?

There are not only one shop online who will sell you Autel xp400pro.

Therefore it is always nice to have a company recommended that someone has

experience with. This is the shop where an increasing number of users bought Autel xp400pro programmer from:

https://www.obdii365.com/wholesale/autel-xp400-pro-key-and-chip-programmer.html


I’m sure obdii365.com is not the most expensive and also not lowest price, but they did answer all of the emails in 24 hours and process the orders in 3- 7 working days. Their orders can be tracked online so you know where it is.


Moreover, how do the users like Autel xp400pro overall?

Firstly, xp400pro is tested to be more powerful than XP400.


Read this related article:

Comparison among Autel xp400pro, XP400, VVDI PROG, new adapters function list, its chip (EEPROM, MCU, ECU) reading / writing list etc.

http://blog.obdii365.com/2020/12/16/autel-xp400-pro-adapter-chip-mcu-immo-and-ecu-list/

Lire la suite
Publicité

Tips to Register and Update GODIAG GD801 Tablet

15 Décembre 2020 , Rédigé par JTAC Publié dans #godiag gd801

 GODIAG GD801 is a newly launched 7.1 inch universal immo and mileage programmer.  GD801 shares the same as obdstar x300 dp key master and software with multi-language options.


Multi-language: English, Italian, Spanish, French, German, Portuguese, Polish, Russian


How to Register GODIAG GD801?

For the first time to use GODIAG GD801 all-in-one key programmer, please register an account firstly.

1.Turn on GODIAG GD801 tablet

2.Select [DiagProgram] and agree with the disclaimer


register-godiag-gd801-1


3.Enter GD801 main menu and select [Settings]


register-godiag-gd801-2


4.Select [User information]-> [Register]


register-godiag-gd801-3


5.The SN and register password will appear on the screen automatically

Fill in user name, password, confirm password, email, and press [Enter]


register-godiag-gd801-4


register-godiag-gd801-5


6.Register successfully


register-godiag-gd801-6


How to Update GODIAG GD801 software?

Built-in WIFI mode can realize application downloading and diagnostic function by one key upgrade.

It’s free to update software in the first year. After one year, you need to pay for the update cost.

Guide to update:

1.Input the available user name and password, press [Login]


update-godiag-gd801-1


2.The related user info incl. SN, user name, Email can be seen in [User information] option


update-godiag-gd801-2


3.Enter [Upgrade] function, select all car software need to update, and press [Bulk update] to update fast


update-godiag-gd801-3


Video reference:

Lire la suite

Launch X431 Mini Pro review on Chrysler Minivans 2009

14 Décembre 2020 , Rédigé par JTAC Publié dans #Launch X431

Car model and year: Chrysler Minivans 2009


Purpose: Adding Remote Start (Sales Code XBM)


This seems like a great project to do. I already have a Launch X431 Pro Mini

bi-directional scanner, and I am wondering if it is capable of doing what the dealer would be able to do (sales codes and WCM config). I know I can access various body modules and have changed how long the lights stay on after the car is shut off, reconfigured the tire size for the speedometer after switching to the larger 17" wheels, etc. It has come in handy for lots of jobs already and I've helped several of my friends and family. It can program keys and fobs and perform ABS bleed procedures. If it keeps me out of a dealership it is well worth the price I paid for it. I am still learning the full extent of it's capabilities, and it is a wonderful tool for diagnostics.

I ordered the hood switch, but it would sure be nice to have that bracket it attaches to. I am sure I could fab one up if I have to. I have also ordered two 7 button cases. The van is usually 20 feet from the house, and is parked maybe 40 feet from where she works, so the range wouldn't be an issue at all, and my wife would be happy to have remote start that isn't all hacked together. She would like to have it on every vehicle she drives, but I tell her no because I have fixed a few cars that had burned up harnesses as a result of aftermarket remote starts, including one that caught fire inside the dash, but that is a story for another day...

I think after I replace her wheel bearings, axles, transmission seals, and do a transmission fluid/filter change, I will attempt this.


Update!

Our T&C is a 2009. I found it easy to switch the rubber pad on my Chrysler logo fobiks to the new 7 button pad with the start label and contact from the 2 generic fobik shells I purchased for about $15 plus shipping. The part number of the switch I had already ordered was 05026211AA and was around $15 US plus shipping. The bracket I ordered today had a part number of 05026445AD, and was around $8 US plus shipping. There was another part number 05026277AE that may have been the whole assembly together, but I didn't see the bracket included in the picture or description. That one was close to $40 though, so it would make sense if that was the one.


www.obdii365.com

Lire la suite

Which Tool to Reset Oil for Passat CC 2019?

9 Décembre 2020 , Rédigé par JTAC

Hi guys, someone is looking for a decent diagnostic tool for 2019 Passat, mainly to Reset lights and service needs (incl oil change) and also provides live data (looking for intake temperature for example). I’d like to put together all working 2019 Passat diagnostic tool and their reviews.


2019 Passat diagnostic tool recommendation:

  1. ZUS® Smart Vehicle Health Monitor Mini (Gen 4): Free

->reset your service interval: NO

->for scan and live data: OK

Review: I have already but it’s pretty limited beyond showing codes and some data.


  1. XTOOL Anyscan A30 Full System Car OBDII Code Reader

A bit overkill, but it’s a great tool and you can do almost everything with it.


passat-cc-oil-reset-anyscan-1


you can check if it would work with your car:

Select Product “Anyscan” – > Brand VW -> Model Passat -> 2013 -2019…

http://www.xtooltech.com/EN/FnList.html


passat-cc-oil-reset-anyscan-2


  1. Launch has a similar tool like the xTool A30: ThinkCar 2 (THINKDRIVER)

It’s a decent tool, it can reset the oil service internal for 2019 Passat (without paying extra money).

You can check the function list at https://www.mythinkcar.com/coverage/checklist


passat-cc-oil-reset-thinkcar2-1


passat-cc-oil-reset-thinkcar2-2


-> This article detailing the full system functions and maintenance functions of the ThinkCar 2: http://blog.obdii365.com/2020/09/28/launch-thinkcar-2-smart-bluetooth-scanner/

(Why every car owner needs Launch ThinkCar 2 Smart Bluetooth Scanner?)


  1. Foxwell NT510 Elite or Foxwell NT530 VW scanner

Reset the oil service internal for 2019 Passat: confirmed


Seeing is believing, please look at the following images:


passat-cc-oil-reset-foxwelll-nt530-1


passat-cc-oil-reset-foxwelll-nt530-2


passat-cc-oil-reset-foxwelll-nt530-3


passat-cc-oil-reset-foxwelll-nt530-4


passat-cc-oil-reset-foxwelll-nt530-5


  1. Foxwell NT630 ABS & Airbag Reset Tool

Reset the oil service internal for 2019 Passat: NO, not working


passat-cc-oil-reset-foxwelll-nt630-1


Enjoy!

Lire la suite

Free Download JLR SDD V160 Software and Patch

8 Décembre 2020 , Rédigé par JTAC Publié dans #JLR SDD

JLR SDD Diagnostic & Programming Software V160 has been tested working perfectly.  Here obdii365.com provides the related download link incl. software, patch, driver and installation guide.


Part 1: Free download SDD V160

1.Free download from from http://diagnosticdelivery.jlrext.com/idscentral


Download the software depends on your need.

Software Version:

V160.01

Supported Language:
English, Dutch, Spanish, Italian, Chinese, Korean, German, Portuguese, Russian, French, Japanese

Release Date:

2020

Support Car Model:

Land Rover/Range Rover 2005 -2016 and Jaguars 1995 -2016

Operating System:

Windows 8/7/Vista/x32/x64

Compatible JLR diagnostic interfaces:  jlr mangoose sdd, jlr mangoose pro, vxdiag vcx nano for jlr


SDD 160.00_FULL.exe

It applies to the user who requires when the SDD machine does not have the previous SDD software installed.


SDD 160_159 UPDATE.exe

It applies to the user who requires to update an SDD machine from the previous SDD software to the latest SDD Software.


SDD 160.01.exe

Contains SDD application enhancements and vehicle software updates and is to be installed after the FULL SDD Software


  1. Free download V159 JLR driver

https://mega.nz/file/oAo3iIJZ#1cBjn9hw4PrL_DIcnL1qDnAu8fP1hakkohoXEpi375Q

Size: 8.9 MB

  1. 3. Free download SDD V160 patch (JLR_SDD_2020)

https://mega.nz/#F!zBpSFarJ!phCGoR3RGYqOHYQa9kVBIw

Size: 92.7 MB

Note: This patch applies to all version after V157.


Supported Vehicle: 

Support 2005 to 2017 which is not DOIP protocol; for newer cars, please use VXDIAG VCX SE DoIP Pathfinder JLR Pro
Supports L316, L319, L320, L322, L359, L538 Land Rover Vehicle Lines
Supports X100, X150, X202, X250, X350, X351, X400 Jaguar Vehicle Lines


Part 2: Guide & Tips to install and update SDD V160 full software:

Please kindly notice:

Failure to complete the installation procedure as instructed will cause the SDD Software to not function correctly.

This would result in the SDD software having to be removed and installed again.


The use of third party Firewalls and Anti-Virus software will cause the installation and functionality of SDD to be affected and may result in SDD not installing correctly.

Refer to Administration Bulletin; JAB00034 & LAB00038 for further information.

For US/Canada refer to: SDD Maintenance & Troubleshooting Guide on TOPIx under: Documents > Diagnostics > IDS / SDD.


Installation guide:

1.Download the Full Installation file eg. “SDD_160.00_FULL.exe” or “SDD 160_159 UPDATE.exe”

2.Download all available Software Updates and install the update in numerical order.

3.Restart the JLR SDD machine


Video reference:


Lire la suite
Publicité

How to Reset Reset 2005 Corvette Brake light by Tech2?

3 Décembre 2020 , Rédigé par JTAC Publié dans #gm tech2

Car model and year:

2005 Chevrolet Corvette M6 base


Symptom:

Brake lights are not working. Including the 3rd brake light.


GM scanner:

  1. I do have an Autel 519.
  2. GM Tech II scanner (is a must tool)


What I tried to do:

Replaced the brake light switch. Swapped back in the original. Still no brake lights.


What should do next? (From experienced user)  

  1. When changing the BPS, did you do a relearn with a Tech II to calibrate it with the BCM.

    When you have the tech II on the car to do the BPS relearn, did you go into BCM data after to see if the pedal was signaling the BCM to turn on the brake lights?

    Hence problem could be BPS not calibrated correctly to start with at the BCM, or could be the wiring/rear bumper void connector, or just rear grounding the problem instead.

    And if you don’t own a Tech II ( at least clone) to work on the car, it’s your first mistake, since even basic items like brake pedal sensor replacement have to be calibrated to the BCM via the tool. So on that note, if you list your location, someone local may have a Tech II to put on the car, until you get your own.


  1. For Autel 519

The brake position sensor is a restate type device, not a on/off switch. So when it replaced in the car and since the each sensor will have a slightly different reading, the BCM has to learn it value when the pedal is not pushed, then when the pedal is pushed.

Double check your Autel 519, but not sure is has a BPS relearn for the GM cars on it, which is required when the brake pedal sensor is replaced.

Once the BPS vavlues have been learned to the BCM, then you can go into BCM data to make sure that the BCM is seeing the changing rates, and activating the brake lights. From here, then we are done to just the fuse and wiring from the BCM to the lights (then ground).

So again, could be the old BPS is worn, and its current resitance values are not the ones first leaned in, the replace values where never learned in, and why the BCM is not seeing the correct values to turn on the brake lights to begin with.


Finally, Solved!

I took the car to my friend’s shop. He fixed it in 5 minutes with a BPS relearn. I’m not sure why this was required. I did change out the switch but I put the original back in. Or the previous owner could have changed it and not known a relearn was required. He actually knocked quite a bit of money off the car because of this issue. Either way I have brake lights!


Good to know:

I have/used just about every Tech II / MDI device known, and it’s the VX GM Nano’s that I use the most (have one in both usb and wifi versions).
Hence it works at both a Tech II using cracked Tech2win software for the C6 and back cars for free that comes with it, and since it is a MDI clone to being with, works for C7 and newer cars running GSD2/TDS as well.

Hence the problem with the hand held tech II clones, is they only work on C6 or later cars, and not the newer cars that need MDI running GDS2 instead.
Regarding using TIS2000 with a hand held tech II clone, the unit only comes with a rs-232 connector cable, so you end up having to pick up a usb cable to connect it to a machine to run tis2000 instead.

So quick break down of GM software.
Tech2win is the same software that the hand held tech II’s runs internally, but runs it on a laptop instead. It’s used for diagnostics, and a few relearn type features.

Tis2000 is used for SPS firmware flashing of the C6 cars back. Note, there is the standard version that only goes up to 2009 cars, then there is the abroad version for spotty internet areas that will go up to 2013, since TDS may not work correctly if the area internet is not fast enough (think abroad where a service area may only have phone dial up).

GDS2 is the diagnostic and some relearn items for the 2014 and up cars.

TDS is the on-line SPS programming that replaced Tis2000 for the new cars from 2009 up for most firmware and special programming, even on the older cars.

As for the VX GM nano, runs all the above software, and in most cases (short of TDS that you would need to pay for a subscription), does so for free. Hence this is the reason that it’s favored, since it covers me on pretty much any GM car running no service fee software..


Credits to @Dano523 (CF Senior Member)


For the reliable clone GM TECH2, MDI and VXDIAG NANO GM, you are advised this one:

GM TECH2

GM MDI

VXDIAG NANO GM (USB)

VXDIAG NANO GM (WIFI) 

Lire la suite

Read Chrysler Crossfire MCU 1D69J by carprog or vvdi prog

2 Décembre 2020 , Rédigé par JTAC Publié dans #carprog, #vvdi prog

 Question:

2005 Chrysler crossfire,  trying to read eeprom and write key but can’t find the option under MCU MC68HC05X32 (1D69J).
Does anyone know which option do I go under?


MC68HC05X32 (1D69J).


Obdii365.com engineer solution:

I. VVDI Prog and VVDI2


It’s hc05 and better desolder to read in adapter !

Xhorse VVDI Prog + HC05 Adapter

Vvdi prog plus adapter hc05 is correct way.

Vvdi prog with the new adapter and latest update will read the hc05 mcu’s just fine.
Hot air off the hc05 chip and read with vvdi prog-adapter. Then use vvdi2 or tango to make the chip. Use lots of flux it makes it easier.
Use the vvdi2, a super chip and shell key. For a flip key fob you’ll need the KR55.
vvdi prog MC68HC05 adapter

 
MC68HC05X32(QFP64) Adapter for VVDIProg
vvdi-prog-MC68HC05-mcu-1d69j-1
 
vvdi-prog-MC68HC05-mcu-1d69j-2
 
vvdi-prog-MC68HC05-mcu-1d69j-3
 
vvdi-prog-MC68HC05-mcu-1d69j-4


I did one I used orange5 to read chip Same process with that. Remove. Orange5 read easy

xprog is another option.


II. Carprog + Tango


Carpog + MC68HC05  Adapter to read MCU

With the correct equipment you can read with in circuit, for example carprog original (didn’t test the carprog clone).

In circuit with this adapter 10 min job. AR32 in circuit or KR55 with Carprog with adapter. Write with Tango.


carprog-MC68HC05-mcu-1d69j-1


carprog-MC68HC05-mcu-1d69j-2


no need to pull with this tool.

Note: Try in circuit may fuck up the information !  You are at your risk.

Then use KR55 or vvdi2 or tango to make the chip.

Tango needs the Mercedes authorization to write chip.

With the KR55 you can make a flip key and remote. Under Mercedes SLK.

Lire la suite

Tech2 Change the Ambient Light Sensor on Chevy HHR

30 Novembre 2020 , Rédigé par JTAC Publié dans #gm tech 2

 I have one Chevy HHR and I had the problem with the dash being in night mode during bright sunlight(meaning the displays were dim and the dimmer would vary the brightness. ) Occasionally they would brighten up to max and the dimmer would no longer control the brightness (daytime mode.) This might never happen but when it did it could be 30 minutes after getting into sunlight. Turning the automatic lights off put it into daylight mode so I know the lamps/displays were all good. Shining a bright light on the sensor wouldn’t cause it to switch. They would stay dim.

The fix was the ambient light sensor at the top of the dash (often called the DRL sensor.) While it’s not a cakewalk to replace, it’s not terribly hard:

Tools to use:
– 7mm nut driver or socket unless a Philips is indicated
– 10mm deep socket and long extension
– Philips screwdriver. Shorty helps.
– Trim tools if you have them but not necessary. Just don’t pull until you know you didn’t miss a screw.
– New sensor: I ordered the 15837063 from the parts PDF and got a 13498957. It sits a bit more recessed in the dash but is otherwise a perfect fit. I don’t know if this is an updated version or they are just shipping one that will fit from some other model car.
– I pasted an illustration of the screws holding the dash top down but it excluded the airbag bolts/nuts (see below.) Check for missed screws before you lift or pull!

1. Disconnect the battery. While you are not removing/disconnecting airbags you are messing around near them. You sure disable the airbags properly.
2. Removed the cubby below the HVAC controls and in front of the shifter. It just pulls out.
3. Remove the two screws holding the shifter surround to the dash under that cubby. Pull the surround back and up. This is to let the radio/HVAC trim to come out easier at the bottom and not break any tabs.
4. Grab the trim at the two dash vent openings at the top and pull. The trim will come out. Tilt it out and lift it from the bottom.
5. Remove the left and right pillar trim. There is a screw under the cover at the top on each side. You don’t need to completely remove them but pull them up so the dash top can lift up. If you have airbags, leave them connected. I don’t have them.
6. Remove the two screws on the left and right side holding the top dash trim to the dash frame. They are under the pillar trim you took off.
7. Remove the two screws holding the top storage compartment box in. Lift it out. (Philips)
8. Remove the two screws under that box holding the trim to the dash under that box.
9. Remove the single screw near the windshield holding the trim to the dash under that box.
10. Remove the two screws under the instrument panel trim at the top (above the cluster.) (Phillips.)
11. Release the two tabs on the lower glove box and let everything fall to the floor. Now let the door/shelf tilt down. Throw away the five year old registrations and insurance cards.
12. You don’t need to remove the air bag, rather removing the nuts (or screwing the down to the end of the bolts) lets the panel lift up.
13. Remove the two 10mm passenger airbag nuts that are on two long screws under the dash along the support beam. If you look or reach up there you can easily feel/see them.
14. On the driver’s side, lift up and pull out on the upper trim. There are clips along the windshield holding it down.
15. Now you can lift up on the center near the sensor and with the nuts on the airbag loosened, you can lift up the center of the dash top, reach in the while scraping the crap out of your hand and remove the sensor. On mine there was enough wire length to let me rotate it (it’s a bayonet lock) and then reach in and press the tab to release the connector. I connected the connector first then reaching in and rotated the sensor into place.
16. Assembly is the reverse. If the top seems to not want to drop flush again, check that the tabs along the windshield are in their slots. Also check the curved/hooked tabs on each side of the cluster. They tend to hang up. Just gently push them in.
17. This is a good time to add any felt pads to the trim to stop the squeaking. 

– While I didn’t measure the good sensor before I installed it (dang), the bad one measured around 15k ohms covered and around 5k ohms with a bright light shining on it.

– If you have a GM Tech 2 scanner, the bad sensor would read around 4.5V in the dark (or covered) and a bright light would make it intermittently dip to 2V but never hold and often with no dip at all. The ambient sensor is in Body/Special Functions./Headlights.


– The new sensor reads 4.5V dark and 2.6V in sunlight on the Tech 2. You could also measure it at the BCM wires. One thing I’ve noticed on mine since I bought it is there is about a 90 second delay from going from a dark garage to sunlight before it switches to daylight mode (DRL and no dash dimmer control.) With the new sensor it now does that again.

If you have any clarifications, see errors or additional details, let me know and I will add/correct them.


gm-tech2-bcm


Credits to @ terryk

Lire la suite

Launch X431 Enables 2020 Macan S rear tail lights with DRLs

10 Août 2020 , Rédigé par JTAC Publié dans #Launch X431

Car model and year: a 2020 Porsche Macan S


Purpose:

to enable the rear tail lights to be illuminated with the DRLs.


Tool to use:

Launch X431 V Bi-Directional Scanner (or X431 ProS Mini etc)


launch-x431-v-scanner


One friend mentioned:

I’ve found this in Rear-end Electronics/Coding/Brush Hidden-Modified/Coding value/Coding value-0


activate-porsche-drls-with-launch-x431


Finally!

OK, so here is the solution for those wanting to activate the DRLs (Daytime Running Lights) on tail lights (this is for a 2020 Macan S).

As we approach our summer equinox with near 22 hours of daylight it’s less of an issue than in 6 months when the inverse occurs and visibility is key. On the version I have, it’s different from what my friend mentions above. In my case, and, as I have mentioned previously, for some unknown reason they’ve put that option in the FRONT END ELECTRONICS. In the section my mentions, the Exterior Lights LED Lights simply confirms that you have LEDs (and not halogen) nothing else in my version. To actually enable them you must go to the section I outline below.


SYSTEM SELECTION -> FRONT END ELECTRONICS->CODE BRUSH HIDDEN

At this point as nothing in that grouping (or the REAR ELECTRONICS for that matter) showed anything pertaining to the feature I want, I went to (initially I just put REAR as a search criteria but here is the exact parameter)

-> SEARCH FOR CODING ITEMS
CODING-EXT-LIGHT-DDL with POSITION- AND-TAIL LIGHT (any part of that string, as I can’t remember the exact position of the dashes, will get you there)

DEFAULT VALUE (NO)

change to YES

WRITE

and you’re done. As you can see there are myriads of permutations as to where different models/versions of Launch X431 decide to place their modules. Furthermore, in this case my friend has a different Porsche software module to mine and probably a different APK as well.


Good luck!


www.obdii365.com

Lire la suite
Publicité

Renault CAN CLIP V200 Torrent Download Free

9 Août 2020 , Rédigé par JTAC Publié dans #Renault CAN CLIP

The latest version V200 Renault CAN CLIP software has been tested working no issue in August 2020.


What's new in Renault CLIP V200?

renault-can-clip-v200

New Features:

-No new vehicles integrated on this CLIP version.

-Diagnosis Help button in New Dialogys

-New RNFI Package Release 


New Adt diagnostic software:

-CLIP will automatically install the XMS Portal software on the computer. XMS will automatically load the new ADT diagnostic software on the PC from September 2020.

-The ADT software will arrive for diagnostics of New Kangoo (XFK) and Trafic III PH2 (X82) in Europe 2021

-Bosch Service Portal for ADT assistance. 


Resource 1:

DOWNLOAD Renault Can CLIP V200

 PASSWORD : internel


 Resource 2:

Renault Can Clip v200 — download

Renault Can Clip Registration
Activation _Patch


Resource 3: 

https://www.obdii365.com/wholesale/cd-software-of-can-clip-v151-for-renault.html

 100% tested and safe. 


Verified working with Renault CAN Clip clone Item #SP19-A, SP19-C and SP19-D


Support Multi-Language: English, German, Denish, Spanish, Finnish, French, Italian, Norwegian, Dutch, Portuguese, Romania, Swedish.


Renault Can Clip Functions:

1. See all the information relating to the vehicle
2. Computer test
3. Automatic test of all computers
4. Airbag test
5. Vantool (OBD tests)
6. Base Doc (access to Technical Notes)
7. Physical measurements
8. Antipollution
9. Multimeter

Lire la suite

Nissan Pathfinder OBDII Engine Scanners Reviews

5 Août 2020 , Rédigé par JTAC Publié dans #foxwell nt530

Looking for Nissan Pathfinder OBDII Engine scanners which is hand-held not based on windows? Please read the following test reports and reviews.


  1. Foxwell NT301 scanner review

I use a Foxwell NT301 only 35usd. Thought I’d only use it once or twice, but I was wrong. Having your own scanner is so convenient.


foxwell-nt301-code-reader


Credits to @ underworld1001.


The editor advise you own Foxwell NT530 ($169), it is dedicated for Nissan cars, which is more powerful than NT301, it can perform special functions.


You can check Foxwell NT530 Nissan Pathfinder function list on official website:


foxwell-nt530-nissan-function-list


  1. Autel MX808 MaxiCheck review

I use an Autel MX808 MaxiCheck which I picked up about 15 months ago. It works with any passenger car or truck with an OBD II port, but for another $99, you can get the OBD I kit which has the connectors for a number of manufacturers OBD I diagnostic ports. MK808 is the scan tool with the OBD I kit. It’s pretty nice! It’s a lot quicker than my former boss’s X431 Launch diagnostic tool and his older OTC Genesys tool. It does an all system code scan, can monitor/graph/read live datastream info, read freeze frame data, can be used to relearn throttle bodies and register TPMS sensor, relearn idle air volume, relearn steering position and a bunch of other stuff. It can update wirelessly and the updates after the first years are reasonably priced. Autel has a number of tools, both less and more expensive. This one was perfect for me and for what I do at home.


autel-mx808-scanner


You can check Autel MX808 MaxiCheck Nissan pathfinder function list on official website


autel-mx808-nissan-function-list


  1. Nissan Data Scan II (NDS II) and a compatible ELM327 Bluetooth OBD II dongle

I used Nissan Data Scan II (NDS II) and a compatible ELM327 Bluetooth OBD II dongle. I assume NDS III will apply to the R52’s but don’t know. But I have all of the usual OBD II data plus all of the Nissan CONSULT II data for the engine control module. Does not have ABS, etc…yet.

The NDS team is in Australia so they didn’t know for sure if their software would work with our VQ’s. Now we do…


To be upgrading…

Lire la suite

Possible to use ISTA-D with openport 2.0?

4 Août 2020 , Rédigé par JTAC Publié dans #ista-d

Question: 
May i have a question if somebody test already tactrix Openport 2.0 J2534 interface to make it works with BMW ISTA/D (ISTA+)?


Solution:
Confirm it its works with ISTA/D, install bmw passthru drivers and set ediabas.ini to: STD:psssthruD
 
You can try this. You first need to get the pass thru drivers from bmw. Install the driver for YOUR pass thru and then follow below
1. Run BMW PassthruD in Administrator(Important!!!)
2. Choose the J2534 device you want and save it
3. COPY all file from  C:\Program files (x86)\BMW AG\PassThruD to C:\EDIABAS\BIN (default) EXCEPT EDIABAS.INI
4. Open EDIABAS.INI in notepad
5. Edit configuration interface = STD:passthrud  and save it!
6. Launch ISTA/D and move to Configuration -> Interface
7. Select EDIABAS.INI and apply it.
it will not work on all models but newer models should work okay. Have tested this and it works. I have a bmw icom now but last time I tried this it worked okay.
 
 
Lire la suite