

/image%2F1896381%2F20151209%2Fob_cb2b49_obd365-com.png)


- Rheingold ISTA + Standalone: v4.09.13
- SQLiteDBs: v4.09.12
Articles récents
Mercedes E210 Key MCU MC68HC05E6 Pinout to Carprog
I need help to read a old key from MB E210 with MCU MC68HC05E6(0F82B) try out of circuit but without success, by UPA adapter 15 and xprog adapter by pinout. Someone here can help me with correctly pinout in circuit or out circuit, i have carprog, xprog, UPA, please!!!

Solution:
connect to a CarProg programmer
For HC05 programming use A10 cable 7 color wires:
YELOW – RX communication signal from MPU;
GREEN – TX communication signal to MPU;
BLUE – Reset signal to MPU;
ORANGE – MODB signal to MPU, low level;
BROWN – GND (ground);
RED – switched +5V;
VIOLET – switched +12V;


Publicité
How to Activate Internet on BMW F10 iDrive with E-sys software
On the BMW F10, it is possible to code Internet / BMW Live with 6VC Combox and 609 Nav by disabling BMW Assist and using a fake VIN with factory 614 Internet written to Combox, and then updating BMW Services.
I detailed that process here:
Change your VO as follows:
– 612 (or 633 or 639 if present)
+ 644
+ 614 (Required but already present)
+ 615
+ 6AL
+ 6AB
VO CODE HU_CIC
VO CODE CMB_MEDIA
FDL CODE CMB_MEDIA:
– TELEMATIK_VIN = Coding_VIN
FDL CODE CMB_MEDIA:
Use modified VO with VIN that has factory options 614 and 615 as explained below:
it is very simple to write a VIN to the Combox in E-Sys coding software
Spend time in Tool32, CMEDIA.prg and E-Sys trying to figure it out.
First you must code CMB_MEDIA / TELEMATIK_VIN = Coding VIN using your real FA VIN. Then, open your FA up in the FA-Editor, change the VIN, Caluclate FP just to make sure there are no problems with it, and then save the FA with a new name, i.e. FA_VIN_FAKE. Lastly, go to the coding module, and under Vehicle Order load your new FA_VIN_FAKE, activate FA, and then FDL code CMB_MEDIA. Lastly, read CMB_MEDIA coding data, and verify the new VIN in brackets. In the attached picture, you can see my Combox and Head Unit are showing two different VIN’s.
Afterwards, either shut down E-Sys, or load your original FA back and activate it before coding anything else. DO NOT code anything else with this FA, and DO NOT write this FA to the car.
For Internet and BMW Live to work, you need a VIN with factory options 614 and 615.
*** Use only to FDL Code CMB_MEDIA; DO NOT write this FA to the Car
1) Enable Data Transfer Option Under Phone
2) Enable Bluetooth Data Tethering on Phone
3) Under Connected drive; Update services (should show BMW Live and Internet services)
4) Go to BMW Live and Internet and make sure it it working
After it is working:
Use original VO with car VIN:
FDL CODE CMB_MEDIA:
– TELEMATIK_VIN = MOST_VIN
Read CMB_MEDIA and verify Short VIN in brackets [xxxxxxx] is car VIN.
DO NOT update services again or you will loose BMW Live and Internet.
*** If you do not return the Combox VIN to car VIN, you will encounter problems with future dealer programming, as the Combox will not be recognized, and programming will hault.
All done with a BMW ENET cable with Esys. $11 did all.
http://blog.obdii365.com/2017/12/24/bmw-e-sys-enet-enables-internet-on-f10-idrive/
How to use Insite 8.2.0 with Inline 5 Data Link on Windows 7
Here’s the instruction on adding Cummins Inline 5 data link truck diagnostic adapter to INSITE 8.2.0 software.
Preparation:
First you need to close all anti-virus software program
Then install Cummins 8.2.0 pro/lite version software
How to Install Activate Cummins Insite 8.2.0.184 Pro and Lite
Step 1: Install Inline 5 driver
Check your operating system, here we set it up on Windows 7 32-bit

Open software CD
Open INSITE.7_6_2.rar-> Software folder->INSITE 5 Drivers


Copy Inline 5.7.0.1 Setup- 32 Bit.exe to desktop
If you use 64-bit system, you copy Inline 5.7.0.1 Setup- 64 Bit.exe to desktop

Install the adapter driver, here we use Cummins Inline5 data link (you can use Inline 6, nexiq or other adapters as well)
Run Inline 5.7.0.1 Setup-32 Bit on desktop as administrator
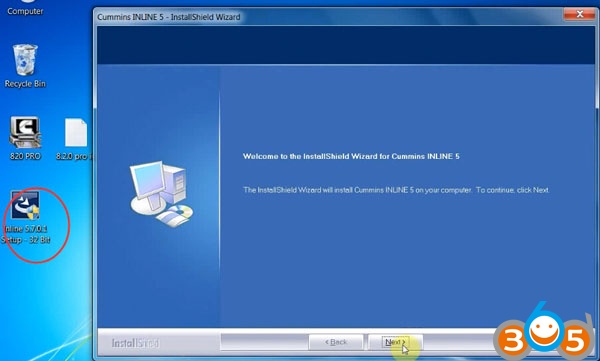
Click on NEXT
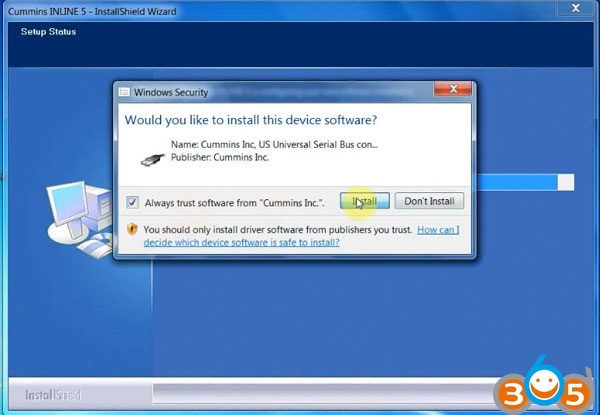
Accept the windows security warning to install driver software
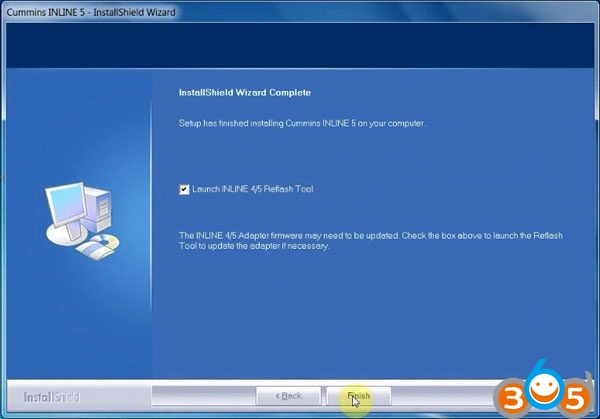
Tick “Launch Inline 4/5 Reflash Tool” and click on Finish
Delete Inline 5.7.0.1 Setup-32 Bit on desktop
Device driver has been successfully installed


Open Computer->Manager->Device Manager->Universal Serial Bus Controller to check device is well connected

Step 2: Add Inline5 adapter to INSITE 8.2.0
Open INSITE 8.2.0.184 pro or lite version software on desktop

Select Add New option on the middle of the bottom tool bar

Click Next to install ECU Connection Wizard

Select RP1210 adapters, click on Next

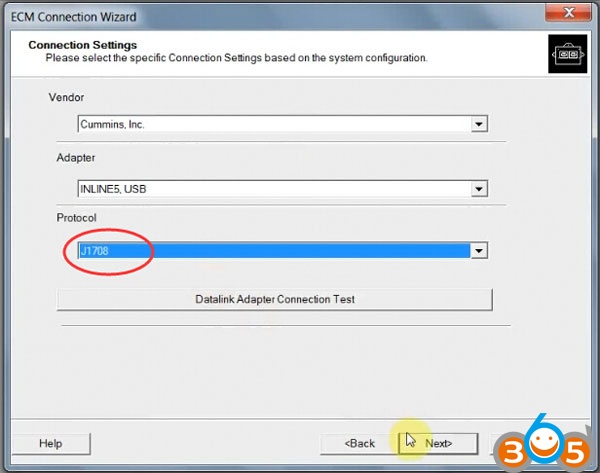
Select Vendor, Adapter INLINR 5 USB and protocol Auto detect, click on Next

Click on Next

Tick both 2 options and click Finish
Again software will prompt to install ECU connection wizard, click next
Do the same setting as above, but this time we choose protocol J1708
Click Finish
Do the setting again, this time we add protocol J1939

Click Finish and cancel ECU connection wizard interface

Please add the corresponding adapter in the iniste software

Select INLINES USB (Auto Detect) Connection on the middle of bottom tool bar

Click Connect button to connect to ECM
Now you can using the software, read fault code, manage data logger, do calibration etc


http://blog.obdii365.com/2017/12/21/use-cummins-insite-8-2-0-184-with-inline5-data-link/
How to Read Renault Grand Senic Pin Code by ODBSTAR X300 DP
We’ve managed to use Obdstar x300 dp key master to read pin code from Renault Grand Senic 5 key card successfully. Easy steps below:
Connect X300 DP host with vehicle via diagnostic socket
Turn ignition on
Select Diag Program->Renault->Renault V30.11 -> PinCode Read->Type 2


Remove the smart card, turn ignition off, press the Start button.
Press ENTER to continue

Reading pin code

OBDSTAR X300 DP read Renault Grand Senic from key card success.

http://www.key-programmer.org/2017/12/21/obdstar-x300-dp-read-renault-grand-senic-pin-code/
Publicité
Carprog Read Citroen Berlingo 2004 BSI 95160 Eeprom
Questions before entering:
I want to modify the mileage of an citroen berlingo 2009. I don’t know what tool i need to purchase and i have no clear instructions found for this car.
Can you guys help me with that?
The information that i already know is that reprogramming is needed in the bsi by Nec and an second time in the odometer by the eeprom if i’m correct?
Solution:
With UPA USB you can do the work. It’s cheap and good.
Berlingo 2009 has EEPROM at BSI and TACHO.
dash 95020
bsi 95128 or 95160
read with upa usb 95128 from BSI. If your upa does not have 95128 option, try to read as 25C128.
95128=25C128
Read 95128 content and write only part where mileage is stored. Quicker and safer.
Any programmer who supports the 25XX or 95XX family, does. Such as Carprog, TL866CS.
Attention to the reading and writing of the eeprom, if the programmer does not read or write well, the car no more starts.
Here’s an example on Citroen Berlingo 2001-2004 BSI odometer correction by caprog 8.21 online version.
read/write eeprom 95160 (change mileage) berlingo bsi 2004 with carprog


Read KM
Original mileage: 148324KM


Enter odometer you desire to change, click on Write KM

Change mileage success.

Related post:
How to Program Ford Transit All Keys Lost with OBDSTAR F100
OBDSTAR F100 Ford/Mazda OBD key programmer Ford Transit key programming with ALL KEYS LOST BYPASS guide.
Connect F100 host with vehicle via OBD socket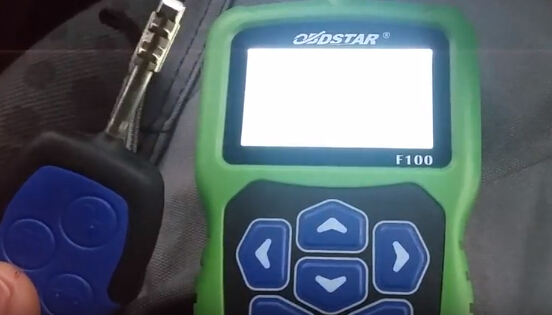
Select Function->Immobilizer->Ford/Lincoln->Ford->
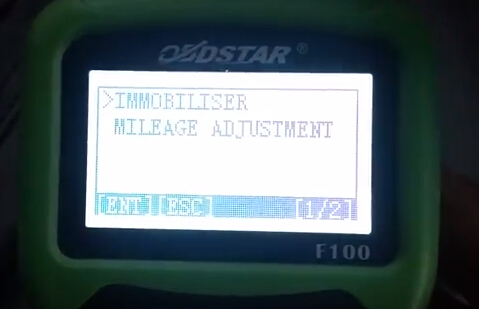

Turn ignition on
Immo indicator flashes 
Select Ford->Immobilizer->Select Region-> Transit-> Program Keys

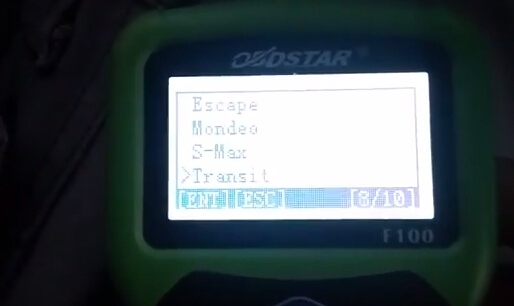
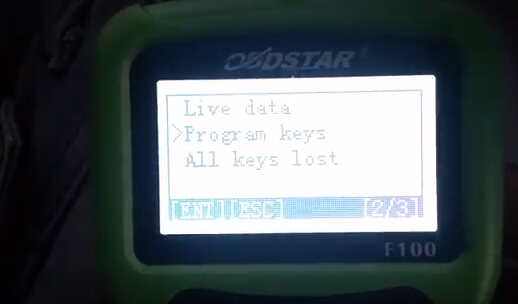
Turn on ignition
This progress does not erase key
Communicating...
Program key success.
Test the new key.
How to use Digiprog 3 for Audi A8 (2003-) odometer correction?
Digiprog 3 v4.94 odometer correction tool how to use for Audi A8 (2003-). Here are notes for you all, of Tacho meter value
Audi A8 (2003-)

Diagnostic connection is located in the cabin

Connect Diagnosis Port with DP3 cable of Plug 16

Ignition on
Connect the DigiProg 3 main unit to Plug 16
The DigiProg needs no separate electricity supply; it is supplied via the diagnosis port
Follow DigiProg3 v4.94 instruction and change KM


Enter KM value and confirm Entry
Audi A8 mileage correction completed!
Before:

After:

Job’s done!
Note: If error message “Access denied” pops up, pls. choose:
PKW/LKW-Audi-A8-2003-(4E) 1. Flash Cxxx/
Dxxx
Confirm with Hook
Remove fuse 5 + 10
Wait approx. 5 seconds
Reinstall fuse
if tacho meter is dark
Switch Ignition on and off
Choose program:
PKW/LKW– Audi—A8-2003-(4E) Diag
Enter KM value and confirm Entry.
Xentry Connect C5 Do not remove hard drive in host
Each Mb star diagnosis DoIP Xentry Connect C5 host comes with a built-in hard drive (green board in picture below) which contains the data that makes the machine run properly. The hard drive is used to reflash/update C5 firmware as well.

Recently come customers are attempt to remove hard drive on Xentry Connect C5 host by themselves and change data on computer, we sincerely warn our customers don’t do that.
Please don’t move the hard drive on SD Connect C5 host. Don’t connect the hard drive to computer to change data. You are at your risk. We are not hold the responsibility of your damage.
You need to send back the hard drive to factory to run firmware upgrade. If the factory provides the firmware upgrade link or online resources, you don’t need to send it back.
By the way, the movable external hard drive (software HDD) in the package contains Xentry Openshell XDOS, and engineering software Vediamo, DTS Monaco etc, it is the correct hard drive you can run on computer.

And don’t insert the software HDD to C5 host to replace original hard drive. It will cause damage to the xentry connect c5 multiplexer.
http://blog.obdii365.com/2017/12/15/doip-xentry-connect-c5-host-hard-drive-and-software-hdd-issue/
Publicité
How to Register JMD Handy Baby with VAG 48 96 bit Copy Function?
JMD Handy baby key copy machine latest software released to V8.8.9. With the latest software, you can copy VAG ID48 96 bit chip online.
Chinese version 8.8.9 is already available, English version Handy baby software will be available on Dec, 15th/16th, 2017.

JMD Handy Baby 96 bit 48 online copy!
Each time decoding need token!
How to register and open Handy baby id48 96-bit online copy authorization?


If you have JMD assistant adapter, register 48 96-bit copy is free.
If you don’t have JMD assistant adapter, you need to pay extra money to register.
For the register and decoding token price, you can contact obdii365.com customer service.
Email: Sales@OBDII365.com
Skype: OBDII365.com
How to use Handy baby to Copy ID48 96 bit chip online?
Demo video
Picture Guides:


http://blog.obdii365.com/2017/12/14/jmd-handy-baby-copy-vag-id48-96-bit-chip/
Rheingold ISTA + 4.09.13 Standalone Free on Mega
The BMW ICOM ISTA standalone version is a version that disables some hardware checks and server checks that are unnecessary for individual users.
As you know, ISTA-D can receive the data related to the vehicle maintenance from the BMW server. If you are a general individual user, you can not access the BMW network anyway.
The installation process is similar to the basic ISTA-D installation process, and the required files are almost all contained within the archive. There is only an RCleaner that initializes the registry, which is included in the ISTA-D download link, so download it if you need it.
version
How to Choose and Use GM Tech2 Clone for Beginners
As titled, here’s little guide on set up a GM tech2 clone scan tool.
STEP 1
Buy a GM tech 2. The Tech 2 remains an essential tool through at least the 2010 model year. Clones are available from $200-$350.
SP23-1 (no case) verify that it includes the 32 MB card
SP23-B3 no case, with 32 MB card and TIS2000 software
SP23-C plastic box, with 32 MB card , TIS2000 and candi interface
It should arrive within a week (took 5 days for me) from Hong Kong.
Some prefer SP23-B3, no case. I bought the sp23-c with candi. The unit comes with a CD and stickers. You made your choice.

STEP 2
Get out an old laptop or buy one online e-shop. It needs Windows XP and a serial port. I run a Dell D630. You can try USB to serial adapters or newer versions of Windows but do you want to mess around with getting old software to run on new computers?
STEP 3
Download cracked TIS2000 from the software on GM forums or use the CD in package and install it on the laptop.
STEP 4
The PCMCIA card comes pre-installed in the gm Tech2. It also comes with a bunch of adapters. You find the one that hooks under the dash. Connect that to the Candi module (that comes with the TEch2) and connect it under the dash. The candi module connects to the tech2. Turn on the tech 2 (the obd2 powers it, no need for wall or cigarette lighter power) and you can read DTCs and stuff.
STEP 5
Now if you want to make changes (such as comfort close or whatever you want to do) there is a menu item on the tech2 that says “Common Adjustments”. Go in there and pick the one you want. Hit ok and then the Tech2 will say it needs security access and tells you what to do to get it (which is basically disconnect the tech2….yes it powers down…and hook up the tech 2 via ethernet cable that is supplied that hooks into a ethernet/serial connector that is also supplied that you hook into the laptop.) Connect the AC adapter to the wall to power the Tech2. You fire up the TIS2000 software on the laptop and on the main screen it says “Get Security Access”. Click on that and it communicates with the Tech2. Click through a few screens and a minute later and it says Level 1 access granted. You unhook the tech2 from the laptop and head back to the car and go back in and change things to your hearts content. Where before it would ask you to get security access you don’t need to anymore.
To make things even easier instead of disconnecting the tech II from the car and having to power it while it communicates with the laptop (the AC adapters are flaky apparently) I just run an extension cord out to my car for the laptop. Disconnect the tech2 from the car when it prompts you to, reconnect it to the obd2 for power, and also to the laptops serial port. Do everything all connected up. It gets a bit crowded in there with a laptop and tech2 and cables, but they can just sit on the passenger seat.
How to Install Launch X431 EZCheck EZDiag App on iPhone?
Here is the guide to install, register and activate Launch EZcheck scanner EZDiag software App to work with iPhone.
Launch EZcheck is a new design OBDII Scanner. X431 EZcheck work with phone same as Launch Easydiag and Launch M-diag. You directly download “EZdiag” app from Android or Iphone will be ok. EZcheck can read fault code and clear code same as X431 Easydiag and X431 M-diag.
First you can scan the QR code on user manual to download the App on iOS or Android APP Store for Free. You can also search EZDiag app on your mobile search engine and install it.

Open EZDiag software application
Sign up EZDiag with user name and password.

Enter your email address (for login or retrieving password)
Choose your region
Set password (At least 6 digit containing numbers, letters and signs)
Activate the EZDiag
Enter serial number and verification code (you can find S/N on the package)
Activation success.
Now you can use the Launch EZCheck EZDiag OBDII scan tool.


http://www.obdii365.com/service/how-to-install-launch-ezcheck-ezdiag-app-to-your-iphone-93034.html
Publicité
VVDI2 or CGDI BMW to read ISN code from MSV80
Confirmed! Both Xhorse VVDI2 and CGDI Prog are able to read BMW ISN codes from the MSV80.
In details…
Option 1: Xhorse VVDI2 BMW read MSV80 ISN codes
Option 2: CGDI Prog BMW read ISN from MSV80
Option 1: VVDI2 4.9.0 read MSV80 ISN no issues
Go to Key Learn, then select ECU ISN
Select Type: MSV80, then Read ECU information

This is ECU info

Recommend: Connect extra power to the car
Need 8 minutes

Reading ISN…


Read ISN from ECU successfully


Job’s done.
Option 2: CGDI Prog read BMW ISN from MSV80 successfully
Method 1: can read directly ISN code in the car,please make sure car voltage is 12V above,directly connect OBD to operate–time about 5 minutes.


Methods 2: can directly split engine computer (DME) to operate–connect diagram as follows:


http://blog.obdii365.com/2017/12/11/read-bmw-msv80-isn-with-vvdi2-or-cgdi-prog/
Volvo Tech Tool 2.6.0.29 Download and Installation
(12/08/2017) Free download Volvo Premium Tech Tool 2.6.0.29 latest version and 2.5.86 tested version for Volvo/Renault/Mack and install on Windows 7/8/10 for use.
Download Tech Tool:
Link 1: PTT 2.6.0.29.iso (Newest)
https://mega.nz/#!mZZjnaSb!vFH83IALo2DjTp9ykgXekWv3DO9_KCn3r3-wQIiGA9Y
Password: NOT required
Activation: NOT activated
Security: Unknown
Files: encrypted files in installation dir:
apci.dll.enc
Volvo.ApciPlus.dll.enc
VolvoIt.ApciPlusData.dll.enc
VolvoIt.ApciPlusTea2Data.dll.enc
VolvoIt.Waf.Authorization.dll.enc
VolvoIt.Baf.BrokerServices.dll.enc
ProductService.dll.enc
VolvoIt.TechTool.DataAccess.dll.enc
VolvoIt.Waf.ServiceContract.dll.enc
VolvoIt.Baf.ServiceHostProcess.exe.enc
VolvoIt.Waf.EswManagement.dll.enc
Link 2: Volvo PTT 2.5.87 (with install tutorial)
https://mega.nz/#!GshUiIYR!xeJjEMstxnwr7KUUuJWvBjulBaUPyhjdegGCtYjfTGo
Rar password is Edward!@#$%^&*()
Activation: NOT activated
Security: Unknown
Language: Multilingual
Link 3: Volvo Tech Tool 2.5.86 (Safest)
http://www.obdii365.com/wholesale/tech-tool-20455-fh4-fm4-apci-update-dev2tool-programming.html
Password: NOT required
Activation: Activation with help of experts on obdii365.com
Security: Tested and 100% safe to use
Language: Multilingual
Volvo PTT Operation System:
Works excellent on Windows 7 Pro, 8 Pro or 10 Pro. 64 bit for less issues!
Make sure to install Volvo TT on a clean pc, less issues;
Make sure all Windows updates are done as well, and user account controls turned off
Tech tool Specifications:
*Special Login id and own Info
*Lasted Apci+ Update
• Volvo Trucks (Older electrical system, Vehicle electrical system ’98);
• Volvo Trucks (VERSION2, VERSION3 – PARAMETER PROGRAMMING);
• Volvo Trucks (VERSION4 – FH4/FM4 – PARAMETER PROGRAMMING);
• Volvo Buses (Conventional, Multiplexed, Multiplexed v2, Multiplexed v3 [/b]);
• Volvo Construction Equipment PARAMETER PROGRAMMING;
• Volvo Penta (VERSION2, VERSION3);
• Volvo OEM Component Customer (VERSION2, VERSION3);
• Mack Trucks (V-MAC I/II/III, ITC, IV, IV+ – PARAMETER PROGRAMMING);
• Renault Trucks (VERSION2, VERSION3, VERSION4 – PARAMETER PROGRAMMING);
• UD Trucks (VERSION2, VERSION3,VERSION4)).PARAMETER PROGRAMMING);
How to install Volvo PTT 2.5.87 on Windows 7 pro/ 8 pro/ 10 pro 64 bit:
Must be a fresh pc with no other installs of volvo ptt.
All windows updates must be done.
Make sure to turn off UAC
turn off user account control
make sure all windows updates are done
extract all files to desktop
run techtoolinstaller_dev.reg
Run setclient id as admin put 179781 for id and click new
when fido asks for id during install use same
now click and run prerquisites click ok to all and put id in when requested
next run main installation package.cmd
finish it all
open techtool and close
reboot pc
run client updater take all updates takes a long time
reboot pc
follow activator instructions in zip folder (just dont copy apci update to folder as it says folder
Download everything install after install reboot pc then update volvo ptt to 2.5.87


http://blog.obdii365.com/2017/12/07/volvo-tech-tool-2-6-0-29-download-install/
CGDI MB 2.3.0.0 adds Mercedes W169 All Keys Lost
CGDI Prog MB Mercedes-Benz key programmer software updated to V2.3.0.0 (2017-12-06).
CGDI MB Prog 2.3.0.0 update feature:
1.Add read, wipe engine computer (ECU) function
2.Add read, wipe gearbox computer (TCU) function
3.Add read, wipe block computer (ISM/DSM/ESM) function
4.Increase support EIS W169 all lost collection
5.Increase support new BE key write function
6.Fixed the problem of the EIS W204 all lost collection error
7.Fixed the problem that part of EIS can not collect data completely when adding key collection
CGDI MB New update came out
ECU support type of Engine 271, 272, 273 read, write and erase
Add AKL for W169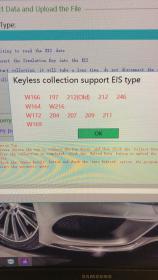
Free Download CGDI MB V2.3.0 Software
http://www.obdii365.com/info/cgdi-mb-prog-update-to-v230-2017-11-06-50529.html
